Thursday, May 31, 2018

Three Lakes Park and Nature Center in Richmond, VA (Blog Hike #683)

Trail: (unnamed)
Hike Location: Three Lakes Park and Nature Center
Geographic Location: north of Richmond, VA (37.61817, -77.43009)
Length: 1.5 miles
Difficulty: 1/10 (Easy)
Date Hiked: May 2018
Overview: Three flat circumnavigations of three lakes.
Hike Route Map: https://www.mappedometer.com/?maproute=734727
Photo Highlight:

Directions to the trailhead: On the north side of Richmond, take US 301 to Wilkinson Road.  This intersection is located 1.5 miles north of I-95 exit 82 or 1.5 miles south of I-295 exit 38A.  Go east on Wilkinson Rd.  Drive Wilkinson Rd. 0.9 miles to the signed park entrance at Sausiluta Drive on the right.  Turn right to enter the park, and park in the large paved parking lot in front of the Nature Center.
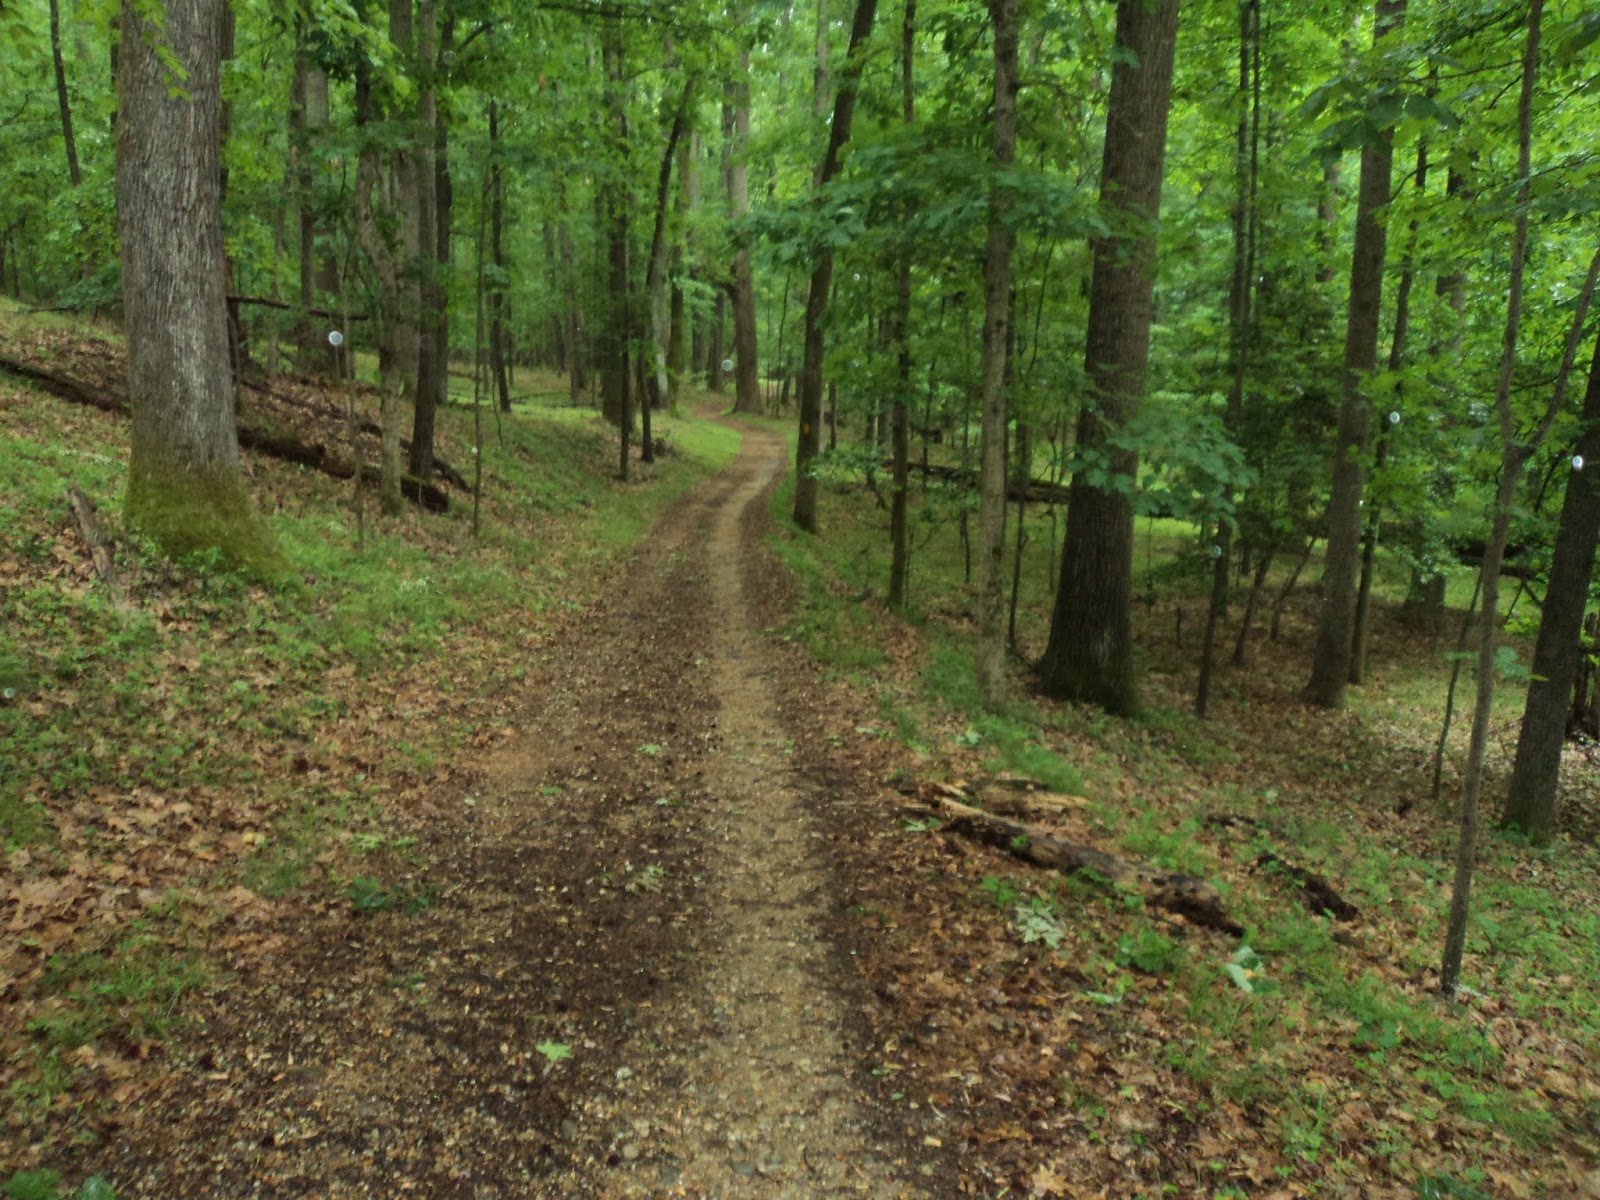
The hike: Owned and operated by Henrico County, tiny Three Lakes Park and Nature Center consists of 118 acres in densely populated suburban Richmond.  As its name suggests, the park features three lakes, unimaginatively named Lake 1, Lake 2, and Lake 3 in increasing order from east to west.  The park also has a play area and two picnic shelters, but perhaps the park’s best amenity is its Nature Center.  Open only in the afternoon, the Nature Center features an unusual aquarium viewing area that is located below the water line, some live animal exhibits featuring lots of snakes and turtles, and an interesting bird song exhibit that helps you associate a particular bird with its tune.
            In terms of trails, the park features three trails open to hiking, and each trail forms a tight loop around one of the lakes.  All of the trails are wide and almost completely flat.  While there are many ways to combine all or parts of the three loops, the route suggested here does a complete circumnavigation of each of the three lakes while minimizing the distance that is hiked twice.
Trailhead near Nature Center
            Start on a wide gravel trail to the left (east) of the Nature Center marked by a wooden sign that says “Trail, Dogs Must Be Leashed.”  Although no signs indicate such, this trail is the one that circumnavigates Lake 2.  The trail heads south with Lake 2 immediately to your right and Lake 1 visible to your left.  Look to the right for nice views of the Nature Center across placid Lake 2.
Nature Center across Lake 2
            In less than 500 feet, you reach a wooden bridge on the left that leads to the Lake 1 loop.  Turn left to cross the bridge, then turn left again to begin a clockwise trip around Lake 1, which is the largest of the three lakes.  The trail surface briefly turns to asphalt as it shares the wheelchair-accessible path that leads to picnic shelter #2.  Picnic shelter #2 occupies a very scenic spot on a peninsula in Lake 1, but the bugs were terrible on the muggy mid-May afternoon that I came here.  Soon you pass the fishing pier on Lake 1, and a couple of small wooded islands can be seen in the lake.  The three lakes are surrounded by dense forest that feature some juniper and hornbeam trees in addition to the usual tree species for eastern Virginia.
Island in Lake 1
            As the trail curves right to head around the east side of Lake 1, you begin walking on an obvious dike that separates the lake from a wetland on your left.  Nice views of the picnic shelter appear across Lake 1.  I saw a few frogs and turtles near the lakes, but this area is too developed for good wildlife viewing.  Just shy of 0.8 miles, you complete your circumnavigation of Lake 1.  Turn left to recross the wooden bridge to Lake 2, then turn left again to continue your journey around Lake 2.
            After tracing the south bank of Lake 2, you reach an area where the trail has been rerouted to the left along Lake 3’s east bank due to erosion.  Continue north on a narrow dike between Lakes 2 and 3, but a short detour down a peninsula to the left may be in order because it gives the best Lake 3 views.  1 mile into the hike, the trail to the Nature Center exits right.  Stay left to continue your journey around the final lake.
Trail around Lake 3
            At the northwest corner of Lake 3, you cross Lake 3’s main water source on an iron bridge with wooden deck.  Many roots protrude through the trail around Lake 3, and therefore it has the roughest treadway of the three trails.  Nevertheless, the going is still very flat and quite easy.  Interpretive signs help you identify some of the trees in the lakeside habitat.
            After hiking across the dike at the south end of Lake 3, the trail coming in from Lake 2 enters from the right, thus completing your circumnavigation of Lake 3.  Head north between Lakes 2 and 3 on the same trail you trod a few minutes ago, but this time turn right on the trail that leads back to the Nature Center.  Quickly you reach the front of the Nature Center and the parking lot to complete the hike.  If it is open, make sure you stop in the Nature Center after your hike if you did not do so before.

Wednesday, May 30, 2018

Richmond National Battlefield Park: Cold Harbor (Blog Hike #682)

Trails: Main, Extended Loop, and Western Trails
Hike Location: Richmond National Battlefield Park, Cold Harbor
Geographic Location: northeast of Richmond, VA (37.58536, -77.28686)
Length: 3 miles
Difficulty: 3/10 (Easy/Moderate)
Date Hiked: May 2018
Overview: A loop hike featuring trenches dug and utilized by Civil War soldiers.
Hike Route Map: https://www.mappedometer.com/?maproute=734726
Photo Highlight:

Directions to the trailhead: Northeast of Richmond, take I-295 to SR 615 (exit 34A).  Exit and take SR 615 north 1 mile to SR 156.  Turn right on SR 156.  Drive SR 156 east 1.9 miles to the Cold Harbor Visitor Center on the left.  Park in the lot beside the Visitor Center.

The hike: Many of the Union’s efforts during the Civil War focused on capturing the Confederate’s capital of Richmond, for many people felt that capturing Richmond would lead to a quick end to the war.  After land advances from the north were repelled at Manassas and Fredericksburg, Union armies attempted to approach Richmond from the east by sea.  Significant battles occurred at Seven Pines, Oak Grove, Beaver Dam Creek, Drewry’s Bluff, Fort Harrison, Gaines Mill, Cold Harbor, and other locations near Richmond.
            Headquartered in downtown Richmond, Richmond National Battlefield Park protects 11 Civil War battlefield sites in and around Richmond.  Four of the 11 sites have Visitor Centers, but the park’s best trail system is at the Cold Harbor site featured here.  The Battle of Cold Harbor lasted for 13 days between May 31 and June 12, 1864, and it represented the Union’s last (failed) attempt at a direct assault on Richmond before turning their attention south to Petersburg.  The Confederates had dug deep fortifications in preparation for such an attack, and the fighting that took place at Cold Harbor was a preview of the trench warfare that would characterize World War I some 50 years later.
            The trenches at Cold Harbor are surprisingly well-preserved, and while you can see them on Cold Harbor’s auto tour road, a more up-close and personal encounter can be had by hiking the site’s trails.  Cold Harbor’s trail system consists of three loops that lie end-to-end: the 1 mile Main Trail, the 1.5 mile Extended Loop Trail, and the 0.9 mile Western Trail.  This hike uses parts of all three loops, and it offers the longest route through the trail system that does not require significant retracing of steps.
Cannon near Main Trail trailhead
            After picking up a trail map at the Visitor Center, start a counterclockwise journey around the Main Trail, which is marked with blue stickers on brown carsonite posts.  The Main Trail leaves the south side of the Visitor Center and heads east across a tall grass field.  A cannon near this trailhead marks where a Confederate gun battery stood; the Union soldiers were encamped on the other side of the field.
            At 0.25 miles, you reach the other side of the field and enter the woods.  As you stand here and look back across the field toward the cannon that marks the Confederates’ position, you start to see the brutality of trench warfare.  Any Union soldier who dared start across that field would be instantly mowed down by Confederate fire from the other side.  Thus, Union soldiers dug their own protective trenches in this area, and soldiers on both sides spent days on end laying in these waist-high trenches unable to leave or even stand up without risking loss of life.
Start of Extended Loop
            Upon entering the woods, the wide trail surface turns from grass to gravel.  0.4 miles into the hike, you reach a trail intersection where the Extended Loop begins.  Turn right to begin the white-blazed Extended Loop.
Union trenches
The trail soon passes a monument to the 2nd Connecticut Volunteer Heavy Artillery before intersecting the asphalt tour road.  Follow the white aluminum diamond trail markers as they lead along the tour road, and watch for oncoming vehicle traffic while walking on the road.  Some of the best-preserved Union trenches are located along this stretch of the tour road, as is a rare reversed trench: a trench originally dug by Confederate soldiers that was later captured and used (in the opposite direction) by Union soldiers.
Exiting the tour road
            After following the tour road for a few hundred feet, continue to follow the white trail markers as they exit the tour road to the right at a signed junction.  Now in the northeastern corner of the park, the trail winds through and around more trenches.   A nice forest with lots of oak and poplar trees creates a quiet and pleasant ambiance.
At 1.1 miles, you cross a private gravel road near where some of the battle’s most intense fighting took place.  After another brief stint on the tour road where private property comes very close on the right, you reach another trail intersection at 1.5 miles.  The white-blazed Extended Loop Trail continues straight, but to see more of the battlefield, turn right to begin the yellow-blazed Western Trail.
Starting the Western Trail
            The newest trail in the park, the Western Trail is narrower and less-worn than the trails you have trod so far, but it is still easy to follow.  After crossing the only wooden footbridge on this hike, the trail descends and passes an interpretive sign that marks an improvised Confederate cannon pit.  These holes in the ground were used to mount cannons at a high angle, which allowed them to lob cannonballs high into the air and over Union earthworks.
Hiking the Western Trail
            Soon you reach the lowest elevation of the hike as the backwaters of Gaines Millpond comes into view as a wetland downhill and to the right.  Next the trail curves left and climbs gradually while following very close to the park’s western boundary.  Concrete and metal boundary markers keep you on park property.
At 2.4 miles, you reach the west end of the Western Trail and another intersection with the Extended Loop Trail.  Turn right turn to continue our loop.  After a gradual climb past some of the best-preserved Confederate trenches on this hike, you reach the asphalt tour road for a third and final time, where the white trail markers indicate that you need to turn right to continue the Extended Loop Trail.  Use the road bridge to cross Bloody Run, a surprisingly small stream that gets its name from a failed Union attempt to out-flank the Confederate trenches you passed just moments ago.
Bloody Run
Confederate trench
After crossing Bloody Run, the Extended Loop Trail ends at an intersection with the blue-blazed Main Trail.  Turn right to head back to the Visitor Center.  After a brief steep climb away from Bloody Run, the trail heads south parallel to the park’s west boundary as it passes more Confederate trenches.  Soon you come out at a grassy field where your car and the Visitor Center can be seen directly ahead, thus signaling the end of the hike.  Before you leave the area, consider driving Cold Harbor’s auto tour road or visiting nearby Gaines Mill, another of the battlefield park’s 11 sites.  Although Gaines Mill has only a short interpretive trail of less than 1 mile in length, the site saw heavy fighting during the Union’s 1862 attempt to sack Richmond, and it makes a worthy stop on your visit to Richmond National Battlefield Park.

Monday, May 28, 2018

Pocahontas State Park: Beaver Lake Trail (Blog Hike #681)

Trail: Beaver Lake Trail
Hike Location: Pocahontas State Park
Geographic Location: west of Chesterfield, VA (37.38650, -77.58205)
Length: 2.5 miles
Difficulty: 4/10 (Moderate)
Date Hiked: May 2018
Overview: A rolling circumnavigation of Beaver Lake.
Hike Route Map: https://www.mappedometer.com/?maproute=734725
Photo Highlight:

Directions to the trailhead: From the intersection of I-95 and SR 288 between Richmond and Petersburg, take SR 288 west/north 6.2 miles to SR 10.  Take the second exit for SR 10 to begin heading east on SR 10.  Drive SR 10 1.5 miles to Beach Road and turn right on Beach Rd.; there is a traffic light at this intersection.  Drive Beach Rd. 4 miles to the state park entrance on the right.  Turn right to enter the park, pay the park entrance fee, and follow signs for the Visitor Center and CCC Museum.  Park in the blacktop lot in front of the CCC Museum.

The hike: Weighing in at 7925 acres, Pocahontas State Park is Virginia’s largest state park.  The park was built by the depression-era Civilian Conservation Corps (CCC) between 1938 and 1942, and initially it was operated by the National Park Service as the Swift Creek Recreational Demonstration Area.  On June 6, 1946, the National Park Service donated the site to Virginia State Parks, and the site was renamed to honor the famous young Powhatan princess from the 1600’s who helped English settlers at nearby Jamestown.
            The park offers nearly every amenity including a 129-site campground, 6 picnic shelters, and boating, fishing and swimming on Swift Creek Lake.  The park also offers more than 54 miles of trails.  While all of the park’s trails are open to hikers, most of the trails are primarily designed for mountain bikers and/or horses.  The park’s longest and probably best hiker-only trail is the 2.5-mile Beaver Lake Trail described here.  The Beaver Lake Trail circumnavigates its namesake lake and provides a good way to observe the many types of wildlife that live around the lake.
Trailhead at CCC museum
            Many trails start at the CCC Museum, which is worth a visit if you come on Saturday or Sunday afternoon when it is open.  Look for the cobalt blue signs that mark the Beaver Lake Trail near the back (south side) of the CCC Museum; the ones near the front of the museum mark our return route.  The Beaver Lake Trail is mostly unblazed, but these cobalt blue signs appear at all intersections.  Follow the asphalt trail (the park calls this trail the Spillway Trail) as it snakes its way downhill toward Beaver Lake.  Several lizards scurried across the asphalt in front of me, the first of much wildlife I saw on this hike.
            At 0.15 miles, you intersect the Beaver Lake Trail.  Angle left to begin a clockwise journey around Beaver Lake.  Soon the asphalt ends as the trail drops below Beaver Lake’s stone spillway.  After crossing Third Branch just below the spillway on a concrete bridge with wooden handrails, you reach another trail intersection where the Old Mill Trail exits left.  As directed by another sign, turn right to continue the Beaver Lake Trail.  Some park maintenance people were hard at work clearing brush here when I passed through on a humid Wednesday afternoon.
Beaver Lake spillway
            The wide dirt trail climbs past the spillway to trace around a wide but shallow ravine.  Although the difference between maximum and minimum elevation on this hike is only about 60 feet, you will go up and down this 60 feet several times.  At 0.5 miles, you arrive back at the lake after a moderate to steep descent.  The next 700 feet may give you the best lake views on this hike.  I noticed a beaver lodge in the middle of Beaver Lake, I sent several frogs plopping into the water, and I sent a family of Canada geese swimming away from the shore.
Beaver Lake
            After curving left to climb away from the lake, a spur trail to an overlook exits right.  While this “overlook” sits atop a bluff and features a nice bench, trees block any view.  The trail continues a general westward course as you pass Beaver Lake’s backwaters downhill to your right.
Beaver Lake Trail near second Third Branch crossing
            At 1.3 miles, the trail descends moderately and curves right to cross Third Branch for the second and final time on another concrete bridge.  A flat area just across the creek would make a great campsite except that backcountry camping is illegal in Pocahontas State Park.  After climbing slightly, the trail forks.  The left option leads to the bike trail system, so you want to angle right to stay on the Beaver Lake Trail.  Some nice tulip poplar trees live in this area.
            The trail undulates slightly before descending to reach a boardwalk over a wetland near Beaver Lake.  A few old interpretive signs sit beside the trail, but they are sufficiently smeared with mud to be virtually unreadable.  Wherever side trails exit left to reach the mountain bike trail system, stay right to remain on the Beaver Lake Trail.
Water lilies near dock
            Just past 2.3 miles, you reach a floating wooden dock on Beaver Lake.  The dock gives nice lake views, and a few water lilies beside the dock were in bloom on my visit.  Past the dock, angle left to follow signs uphill for the CCC Museum.  Reaching the museum marks the end of the hike.

Friday, May 25, 2018

Petersburg National Battlefield: Harrison Creek Loop (Blog Hike #680)

Trails: Jacob Road, Battery 7, Friend, and Harrison Creek Trails
Hike Location: Petersburg National Battlefield
Geographic Location: east side of Petersburg, VA (37.23261, -77.35437)
Length: 3.1 miles
Difficulty: 3/10 (Easy/Moderate)
Date Hiked: May 2018
Overview: A loop hike through the eastern half of a Civil War siege site.
Battlefield Information: https://www.nps.gov/pete/index.htm
Hike Route Map: https://www.mappedometer.com/?maproute=734724
Photo Highlight:

Directions to the trailhead: The entrance to Petersburg National Battlefield is located on SR 36 2.4 miles east of I-95 exit 52 or 3.4 miles west of I-295 exit 9B.  Enter the battlefield, stop at the Visitor Center to pick up a trail map, and drive the one-way auto tour road to stop #3, where this hike begins.

The hike: Most Civil War battles lasted a few hours or a few days, but the Siege of Petersburg started on June 15, 1864 and lasted until April 2, 1865.  After several direct assaults from the north failed to take Richmond, the Confederacy’s capital, Union General Ulysses S. Grant turned his focus south of Richmond to the industrial center of Petersburg.  The objective was to capture the manufacturing and transportation facilities that were supplying Confederate General Robert E. Lee’s army, thus forcing him to abandon Richmond and ultimately surrender.
            After an initial assault on Petersburg failed, Grant’s army began the process of building fortifications and cutting railroad lines.  The outnumbered Confederates withstood another noteworthy assault on July 30, 1864 (see the end of this post), but months of continuous shelling, skirmishing, and supply deprivation took their toll.  On March 25, 1865, a desperate Confederate attempt to break the siege failed, and on April 2, 1865 Lee ordered the evacuation of Petersburg and Richmond.  This evacuation was the beginning of the end of the Confederacy, as Grant forced Lee’s surrender at Appomattox Court House only 7 days later.
            Today important battle sites are preserved as Petersburg National Battlefield, and the national battlefield’s largest contiguous area is the eastern front where the majority of Grant’s men were stationed.  Like most national battlefields, a tour road passes many of the battle’s important sites, but unlike most national battlefields the eastern front also has an extensive trail system for hikers, mountain bikers, and horses.  The loop described here features the area east of Harrison Creek, an important line of defense during the battle, but it can be extended to tour more of the battlefield if you wish.
Trailhead, auto tour stop #3
            Three trails depart the parking area at stop #3 on the tour road.  Because trail markings at Petersburg National Battlefield are color-coded based on allowed users, all three trails are marked with red paint blazes, meaning only hikers and mountain bikers are allowed.  (For reference, green blazes mean hikers only, and yellow blazes mean hikers, mountain bikers, and horses are allowed.)  The trail on the right will be our return route, and the trail in the middle leads to adjacent Fort Lee, an active military base.  Thus, you want to take the trail on the far left, which a sign identifies as the Jordan Point Road.
            The two-track gravel trail heads east through some nice forest consisting of tulip poplar, sweet gum, maple, oak, and beech trees.  Although parts of the national battlefield consist of sunny grassy areas, most of this hike stays in the shady forest.  All of the battlefield’s trails are wide and well-maintained, making for pleasant hiking even on the trails that allow horses.
East end of Jordan Point Road
            At 0.3 miles, you reach the eastern end of the Jordan Point Road.  Major intersections in the battlefield’s trail system are identified by letters on wooden posts; this intersection is point G.  Turn left on the yellow blazed trail to begin heading north.  This section of trail lies very near the battlefield’s eastern boundary, and vehicle traffic from Fort Lee can be heard and sometimes seen to the right.
Follow the yellow blazed trail
            Just past 0.5 miles, you reach the highest elevation of this hike at point I.  Turn left to head away from the road and continue the loop.  The trail map calls this trail the Battery 7 Trail (named for a Confederate gun battery that was stationed here early in the battle), but no signs on the ground indicate such.
            The Battery 7 Trail makes a gradual descent through the northeast corner of the battlefield.  Ignore red-blazed side trails that exit left and stick with the wider yellow-blazed trail.  More traffic noise from SR 36 can be heard to your right, and a light to moderate rain started to dampen my clothes but not my spirit at this point in my hike.
Crossing the tour road
After crossing a small creek on a nice wooden footbridge, you cross the asphalt tour road at 1.2 miles.  Next comes the steepest part of the hike, a winding descent into the ravine that contains Harrison Creek.  Early in the battle, Harrison Creek separated the Union soldiers to the east and the Confederate soldiers to the west before the Union made small westward advances.  Also, the Confederate’s desperate attempt to break the siege on March 25, 1865 stalled at Harrison Creek.  As you walk along this creek, think of the soldiers who fought here many years ago and what they were fighting for.
The trail parallels Harrison Creek with a steep hillside rising to your left.  At 1.7 miles, you reach the lowest elevation on this hike (40 feet above sea level) and point M, a trail intersection where both options are marked with yellow blazes.  If you wanted to extend your hike and explore the western half of the eastern front, you could turn right here and cross Harrison Creek.  This hike angles left to continue following the creek’s east bank.
Hiking near Harrison Creek
The next 0.3 miles stay very close to Harrison Creek and pass several battlefield interpretive signs that are worth stopping to read.  At 1.9 miles, you cross the asphalt tour road for the second and final time.  Soon thereafter the trail curves left and begins a winding gradual climb away from the creek.
At 2.2 miles, you reach point Q and another decision.  The shortest route back to the trailhead would be to turn left on the red-blazed Water Line Trail, but as its name suggests this trail is dead straight and not very scenic.  Thus, I recommend angling right at point Q and then turning left at nearby point R to remain on the Harrison Creek Trail for as long as possible.
The Harrison Creek Trail stays on the high ground as it curves sharply left to begin an eastward course.  2.8 miles into the hike, you reach point B, where you need to turn left.  Another 0.3 miles of flat walking on wide trail returns you to the trailhead to complete the hike.
The Crater

Tunnel dug by Pennsylvania coal miners
As you drive the rest of the one-way auto tour road to exit the national battlefield, there is at least one other tour road stop that merits your time and attention.  Tour road stop #8 features an interesting site called the Crater, a Union attempt to blast its way into Elliott’s Salient, a Confederate stronghold.  A 0.4 mile paved interpretive trail tells the story of some Pennsylvania coal miners who dug a tunnel under the salient and packed the tunnel with gunpowder.  Although the gunpowder was successfully detonated on July 30, 1864, the result was a crater that proved just as effective at stopping the Union advance as did the original earthwork.  This site makes a nice way to wrap up your day of hiking and historical meditation at Petersburg National Battlefield.

Saturday, May 5, 2018

Caesars Head State Park: Raven Cliff Falls Trail (Blog Hike #679)

Trail: Raven Cliff Falls Trail
Hike Location: Caesars Head State Park
Geographic Location: northwest of Cleveland, SC (35.11594, -82.63817)
Length: 3.9 miles
Difficulty: 5/10 (Moderate)
Date Hiked: May 2018
Overview: An out-and-back to a nice view of impressive Raven Cliff Falls.
Hike Route Map: https://www.mappedometer.com/?maproute=734066
Photo Highlight:

Directions to the trailhead: From Cleveland, take US 276 north 13.6 winding miles to the signed Raven Cliff Falls parking area on the right.  You will pass the Visitor Center for Caesars Head State Park about 1 mile before reaching the trailhead parking area.  This parking area had plenty of space when I hiked here on a Tuesday morning, but it can overflow on warm-weather weekends.

The hike: If you drive to this trailhead by taking US 276 north out of Greenville, you will see the unusually shaped granitic gneiss rock outcrop that gives Caesars Head its name miles before you start the serpentine drive up the mountain to reach it.  With an elevation of 3208 feet, Caesars Head stands nearly 2000 vertical feet above Greenville, so the temperature usually remains several degrees cooler.  When I hiked here in early May, I had mowed the grass 4 times at my house down in Anderson, but the trees up at Caesars Head were just starting to put out leaves.
            Established only in 1986, Caesars Head State Park is the western anchor for the Mountain Bridge Wilderness Area, one of the top hiking destinations in South Carolina.  The state park Visitor Center you drive past on your way to the trailhead is worth a stop for two reasons.  First, the Visitor Center contains an interpretive museum that features a relief diorama of the entire Mountain Bridge Wilderness Area.  Second, adjacent to the Visitor Center sits a fantastic overlook at the edge of Caesars Head.  You can see Greenville from here on a clear day, and from September through November hawks migrating through the park soar beside you on the thermals created by the rocky outcrop.
            For hikers, Caesars Head State Park offers more than 60 miles of trails, but the park’s most popular and scenic hike is the out-and-back on the Raven Cliff Falls Trail that leads to 420-foot Raven Cliff Falls.  The Raven Cliff Falls Trail follows the edge of a ridge for its entire distance, so the trail offers some up-and-down without the extreme difficulty found on some of the park’s other trails.  Of course, Raven Cliff Falls is the main attraction of this hike.  Also, note that although the park lists this hike at 4.4 miles in length, the distance I gave at the outset is more accurate based on my calculations.
Trailhead: Raven Cliff Falls Trail
            Start by walking out to US 276 and crossing it via a marked crosswalk.  On the far side of the road lies the information kiosk and self-registration station that comprise the Raven Cliff Falls Trail’s trailhead.  Registration and payment of the park entrance fee are mandatory.  The Raven Cliff Falls Trail starts as a two-track gravel road that heads downhill on a moderate to steep grade.
The road you are following at the outset is used to access a water utility building, and at 0.25 miles you reach said building and a sign for the Middle Saluda Passage of the Palmetto Trail.  South Carolina’s two best backpacking trails, the Palmetto Trail and the Foothills Trail, also use this route even though the Raven Cliff Falls Trail’s red paint blazes are the only markings.  Past the utility building, the hike follows a wide single-track dirt treadway for the rest of its course to Raven Cliff Falls.
Single track sidehill trail
Although the difference between maximum and minimum elevations on this hike is only about 200 feet, several short but steep ups and downs will need to be negotiated starting with a short climb away from the utility building.  The trail next clings to the side of the hill, which rises to your right and falls to your left.  Some partially obstructed views of the Piedmont nearly 2000 feet below open up along this section, and I saw a pileated woodpecker fly into the air from a tree below me.  Large numbers of purple violets grew beside the trail.
At 0.8 miles, you reach the first of three abrupt turns that are marked with double red paint blazes.  Some old logging roads in this area might look like trails, but watching for the copious red blazes will keep you on the real trail.  Next comes a short quick descent via some wooden stairs through an area with rock outcrops.  A thick understory of mountain laurel grows in this area, which is noteworthy because most of the understory is quite sparse.
Descending past rock outcrops
Soon the trail rejoins an old logging road, and at 1.5 miles you reach a trail intersection.  The blue-blazed Foothills and Gum Gap Trails exit right and lead to a top-down view of Raven Cliff Falls from a suspension bridge.  Our hike turns left to stay on the Raven Cliff Falls Trail and head for the best waterfall view.  Intersections have trail maps posted, so it is hard to get lost if you just follow the red blazes.
Deep rut in treadway
The treadway gets a little rutted and rough as a moderate descent ensues.  At 1.9 miles, you reach another trail intersection.  The narrow and steep purple-blazed Dismal Trail continues straight, so you need to angle right to stay on the wider Raven Cliff Falls Trail.  0.1 fairly flat miles later, you reach the trail shelter that gives the award-winning view of Raven Cliff Falls.  Although you are more than 0.5 miles from the falls, the waterfall’s size and the overlook’s perfect near-frontal angle ensure that you get a good view.  Several smaller drops precede the main drop in this aquatic feast for the eyes and ears.  Benches provide nice places to sit, rest, have a snack, and enjoy the scenery.
Raven Cliff Falls
The Raven Cliff Falls Trail ends at this overlook, so now you have to choose how you want to finish this hike.  The simplest and easiest option is to retrace your steps 2 miles along the red-blazed Raven Cliff Falls Trail.  To increase the distance but not the difficulty, you could take the blue-blazed Foothills and Gum Gap Trails to the pink-blazed Naturaland Trust Trail, which quickly leads to the aforementioned suspension bridge perched just above Raven Cliff Falls.  Turning around at the bridge produces a hike of just over 6 miles.  For the fit and energetic hiker, an 8 mile lollipop loop can be formed by taking the purple-blazed Dismal Trail into the ravine below the falls and then connecting with the Naturaland Trust and Gum Gap Trails.  This trek is steep and rocky with roughly 1500 feet of elevation change, and it should only be undertaken with adequate supplies and preparation.  Choose your own adventure to finish your visit to Raven Cliff Falls.