Wednesday, July 30, 2014

Santa Fe National Forest: Black Canyon Trail (Blog Hike #479)

Trail: Black Canyon Trail
Hike Location: Santa Fe National Forest, Black Canyon Campground
Geographic Location: east of Santa Fe, NM (35.72806, -105.83930)
Length: 2.1 miles
Difficulty: 5/10 (Moderate)
Date Hiked: July 2014
Overview: A lollipop loop through the upper reaches of Black Canyon.
Hike Route Map: https://www.mappedometer.com/?maproute=726650
Photo Highlight:

Directions to the trailhead: On the northeast side of Santa Fe, take Paseo de Peralta to Bishops Lodge Road.  Turn north (outbound) on Bishops Lodge Rd.  Drive Bishops Lodge Rd. 0.2 miles to Artist Road and turn right on Artist Rd.  Artist Rd. becomes SR 475 and Hyde Park Road as you leave Santa Fe.  Drive SR 475 a total of 6.9 miles to the Black Canyon Campground entrance on the right.  Turn right to enter the campground, then immediately turn left to park in the signed hiker (as opposed to camper) parking area.  Vault toilets are available at this parking area.

The hike: What a difference 1000 feet makes.  At 7260 feet, Santa Fe, NM has the highest elevation of any state capital, and it has a very dry climate that supports mostly desert shrubs for vegetation.  At 8300 feet, the Santa Fe National Forest’s Black Canyon Campground sports a thick cover of tall, mature pine trees that provide abundant shade on hot summer days.
            Many people seem to have discovered the pleasures of Black Canyon Campground, as every campsite was either occupied or reserved on the Monday morning I came here.  Fortunately, you do not need to reserve a campsite to hike this trail, so anyone can schedule a daytime visit to this slice of mountain paradise.  If you are here only to hike, make sure you park in the signed hiker parking area so that you do not block any campsites.
            Before starting the hike, I should clarify one thing about the trail length.  The difference in trail length between what I have posted here and the official 1.5 miles listed by the forest service is due to a difference in starting point.  The forest service starts at the Black Canyon Trail trailhead, which is located at the rear of the campground.  I started this hike at the hiker parking area, which is located at the front of the campground.
Black Canyon Trail trailhead (at rear of campground)
            As the previous paragraph implies, this hike starts with a walk through the campground.  Follow the paved campground road uphill, gaining about 100 feet of elevation between the parking area and the trailhead.  Where the road forks to form the campground loop, you can go either way.  The signed trailhead is located at the very rear of the campground between campsite #24 and a vault toilet.
            The Black Canyon Trail proper heads up the canyon with steep but not vertical canyon walls on either side.  At first the grade is gradual, but it becomes more moderate as you climb.  This section of trail appears to follow an old dirt road.
Trail forks to form loop
            0.6 miles into the hike (or 0.3 miles out of the campground), the trail forks to form its loop.  For no particular reason, I chose to turn left and hike the loop clockwise.  The grade intensifies slightly as you leave the old road and continue climbing through a forest of tall ponderosa pine trees.  This section of trail is an excellent example of sidehill, the likes of which you rarely see on trails constructed post-Great Depression.
Climbing along the canyon wall
            After climbing a pair of switchbacks, you reach the trail’s highest point as you reintersect the old road near 1 mile into the hike.  Turn slightly right to continue the loop.  Note that turning left here would take you over the hill and into the watershed that supplies Santa Fe’s drinking water, an area strictly forbidden to hikers.
            As the old saying goes, it’s all downhill from here.  The trail descends moderately using a single broad switchback.  A few partially obstructed views can be had through the pine trees, but you will need to visit adjacent Hyde Memorial State Park if you want any real vistas.
Hiking through an aspen grove
As you reenter the main stem of the canyon, the pine trees briefly give way to aspen trees.  The slightly higher water tables in the main canyon allow aspen trees to grow down here.  This section of trail would be fantastic when aspen leaves are changing color in the fall.  At 1.5 miles, you close the loop.  0.6 miles of easy downhill hiking remain to complete the hike.

Tuesday, July 29, 2014

Bandelier National Monument: Main Loop Trail (Blog Hike #478)

Trail: Main Loop Trail
Hike Location: Bandelier National Monument
Geographic Location: southwest of White Rock, NM (35.77941, -106.27104)
Length: 1.6 miles
Difficulty: 4/10 (Moderate)
Date Hiked: July 2014
Overview: A partially paved loop past Pueblo and cliff dwelling ruins.
Hike Route Map: https://www.mappedometer.com/?maproute=726649
Photo Highlight:

Directions to the trailhead: For most people, the Frijoles Canyon portion of Bandelier National Monument, where this hike is located, is only accessible via a free shuttle bus.  The bus departs every 20 minutes from the White Rock Visitor Center in the town of White Rock.  The Visitor Center is located on SR 4 in downtown White Rock; the address is 115 New Mexico State Road 4.

The hike: For my general comments on Bandelier National Monument, see the previous hike.  This hike explores some of the pueblo and cliff dwelling ruins that lie near the Visitor Center.  This trail is named the Main Loop Trail for a reason: most of the 150,000 annual visitors will hike this trail at some point during their visit.  Thus, to avoid the crowds you might want to hike one of the monument’s other trails first and then hike this one so that your hike does not coincide with a shuttle bus arrival.
Information board at trailhead
            The trail starts at an information board just outside the back door of the Visitor Center.  The first 0.25 miles of this trail are paved and ADA-accessible.  Notice some sand on and beside the trail; this sand was deposited here by the 2011 and more recent flash floods.  Numbered posts coincide with a trail guide available for purchase at the Visitor Center.
            Just shy of 0.2 miles, you pass a kiva.  A kiva is an underground chamber used by the Ancestral Pueblo for ceremonial purposes.  This kiva has been un-roofed so that visitors can easily see inside.  Entry into the kiva, however, is prohibited.
Un-roofed kiva
            At 0.3 miles, you reach the main pueblo ruins.  The Ancestral Pueblo people called this village Tyuonyi (pronounced QU-weh-nee).  In its heyday, Tyuonyi stood 1 to 2 stories high and housed about 100 people.  The trail winds around the low rock wall ruins, allowing you to study the site up-close.
Tyuonyi
            Past the ruins, a short-cut trail exits left while this hike angles right.  Your next destination is the cliff dwellings that you can see uphill to the left.  After briefly heading up a narrow side canyon, the trail climbs using concrete steps with a metal railing.  Notice some holes in the easily eroded pink tuff rock on your right as you climb.  The tuff’s ease of carving is one reason this canyon made an ideal location for constructing cliff dwellings.
            At the top of the steps, you reach the cliff dwellings.  Some ladders allow visitors to access holes that served as primitive houses, and some more developed cliff houses lie just ahead.  These cliff dwellings bear such a striking resemblance to those at Mesa Verde National Park in southwestern Colorado that many experts think they were built by the same group of people at different times in their migratory history.  This spot also gives nice views of Frijoles Creek, now almost 100 feet below you, and gets you close to some of the unusual rock formations formed by the tuff.
Developed cliff dwelling
            Near 0.5 miles, the Frey Trail exits right to head uphill to the park’s Juniper Campground.  Continuing on the Main Loop Trail, the stairs narrow considerably as you descend to meet the other end of the short-cut trail.  Turn right at this intersection and climb a final set of steps to reach a cliff dwelling called the Long House.  At this site, the Ancestral Pueblos built a cliff dwelling several stories high and carved some petroglyphs in the canyon walls.  This dwelling and the ruins at its base look more primitive than some of the cliff dwellings you passed earlier.
Long House cliff dwelling
            Past the Long House, the trail descends on a gradual to moderate grade to reach the east bank of Frijoles Creek.  A bridge used to span the creek here, but all bridges except one were removed in preparation for the flash floods of 2011.  Thus, these days you cross the creek on wood planks.  Truth be told, most of the year the creek is dry enough that you can cross it with no aid whatsoever.
Crossing Frijoles Creek
            Now on the west bank of the creek, you quickly arrive at an intersection with a 0.5 mile spur trail that leads to the Alcove House.  A bear-resistant trash can and log bench also sit at this junction.  If you want to see another ruin, you can turn right and extend your hike by 1 mile to see the Alcove House, but this description will turn left to head back to the Visitor Center.
            The last 0.8 miles of this hike follow a pleasant, shady, sandy-dirt nature trail that parallels Frijoles Creek.  Interpretive signs identify some of the flora and fauna that live along the creek.  A couple of bridges used to head back to the east side of the creek, but they no longer exist.  The absence of these bridges causes this loop to be slightly longer than the official distance published in the park’s trail guide.
Bridge over Frijoles Creek
Near 1.3 miles, the Visitor Center’s sandbags come into view across the creek, but you need to continue downstream to the park’s only remaining bridge, which is located about 600 feet past the Visitor Center.  Cross the bridge and walk across the parking lot to the Visitor Center to complete the hike.

Saturday, July 26, 2014

Bandelier National Monument: Falls Trail (Blog Hike #477)

Trail: Falls Trail
Hike Location: Bandelier National Monument
Geographic Location: southwest of White Rock, NM (35.77826, -106.27050)
Length: 3 miles
Difficulty: 5/10 (Moderate)
Date Hiked: July 2014
Overview: A canyon out-and-back to 80-foot Upper Falls.
Hike Route Map: https://www.mappedometer.com/?maproute=726648
Photo Highlight:

Directions to the trailhead: For most people, the Frijoles Canyon portion of Bandelier National Monument, where this hike is located, is only accessible by a free shuttle bus.  The bus departs every 20 minutes from the White Rock Visitor Center.  The Visitor Center is located on SR 4 in downtown White Rock; the address is 115 New Mexico State Road 4.

The hike: One thing leads to another.  The first people to enter Frijoles Canyon, the center of today’s Bandelier National Monument, came over 10,000 years ago as nomads following the game they were hunting.  Because Frijoles Creek was one of the few permanent water sources in the area and because the canyon’s soft rock walls were easily carved into house-like structures, the Ancestral Pueblo eventually chose to settle here around 500 B.C.  The canyon’s population peaked between 1400 and 1600 A.D. as improvements in irrigation allowed more farming on the canyon floor.
            In 1598, the Spanish arrived, and later Spanish settlers farmed and ranched in the canyon, forcing the Ancestral Pueblo people out.  The last Spanish family moved to more fertile land in 1883, and the canyon’s land reverted to public domain in 1893.  About that same time, Adolph Bandelier visited the canyon several times as a guest of the Pueblo Indians, and efforts began to preserve the canyon as a national park.  That effort bore fruit in 1916 with the establishment of Bandelier National Monument.
            The cause-effect narrative continues today.  In June 2011, the Las Conchas wildfire, the largest wildfire in New Mexico history, consumed nearly 75% of the monument, leaving exposed, bare ground.  Two months later, flash floods enhanced by extreme runoff from the bare ground swept through the canyon.  Thanks to a wall of sandbags that still remains today, the Visitor Center sustained only light damage, but the parking area and several trails sustained major damage.  The damaged parking area is the reason the monument is accessible almost exclusively by bus today.
            The archaeological sites explored on the next hike survived the flood relatively intact, but the Falls Trail described here did not.  Indeed, the Falls Trail used to explore the entire lower Frijoles Canyon all the way to the Rio Grande River, passing two waterfalls along the way.  Today the trail ends at the first waterfall.  The rest of the trail was washed out, and there are no plans to rebuild it.  The trail as currently configured still makes a nice if shorter hike.  Also, because most visitors hike only the Main Loop Trail described in the next hike, this hike offers decent solitude away from the crowds.
Falls Trail trailhead
            The trailhead for the Falls Trail is harder to find than it used to be.  From the front of the Visitor Center, walk along the right side of the parking lot to a wooden bridge that crosses Frijoles Creek.  This bridge is the park’s only remaining permanent bridge over the creek.  Cross the bridge, angle left, and walk down what remains of the washed-out portion of the parking area.  The trailhead sign for the Falls Trail is located at the end of the washed-out parking area.
            The dirt trail climbs slightly to reach an information board that sits in the sun just outside the shade of tall ponderosa pines.  About half of the Falls Trail passes through the shaded area along Frijoles Creek while the other half is exposed to the sun.  Also, weather changes quickly in the New Mexico mountains: I started this hike in a cool rain shower and finished it in bright, hot sunshine.  Make sure you wear a hat and sunscreen in the summer and come prepared for changing weather.
Frijoles Creek ravine
            The trail descends through the canyon on a gradual and then a more moderate grade.  Numbered posts correspond to a trail guide that is available at the Visitor Center for a small price.  Two types of rock are found in Frijoles Canyon: pink-colored and easily eroded tuff rock and harder black-colored basalt rock.  At the top of the steepest section of trail, you pass post #5, which marks a couple of large blocks of tuff called tent rocks.
Tent Rocks
            At the bottom of the hill, Frijoles Creek (or perhaps a nearly dry creekbed) comes into view on the left.  It is hard to believe a creek this small caused the damage in the 2011 flash floods, but such is the nature of desert waterways.  At 0.8 miles, you cross the creek on a pair of wooden planks.  The planks bent greatly under my substantial weight, but they got me across.
Plank crossing of Frijoles Creek
            Now on the east side of the creek, you soon see why the creek crossing was necessary: a large outcrop of tuff appears across the creek to your right.  The gradual descent continues as black basalt boulders appear beside the trail.  Large patches of scarlet trumpet grow along the trail here in season.
Scarlet trumpet
Just over 1 mile into the hike, you cross the creek again, this time with no bridge.  Both of these creek crossings used to have permanent bridges, but the flash floods ensured that such is no longer the case.  The trail climbs for a short distance to top a final hill, where a full view of the lower canyon opens up.  The Rio Grande River comes into view at the canyon’s mouth.
The final segment of trail clings to the hillside, which rises to the right and falls to the left.  At some points a vertical cliff nearly 100 feet high falls away to the left of the trail, so take care where you step.  After descending a single switchback, you arrive at the unsigned viewpoint for Upper Falls.  On my visit near the beginning of New Mexico’s monsoon season, the waterfall was more of a trickle, and I felt like renaming this trail the Drips Trail.  The sheer black basalt rock walls around the waterfall make a nice setting, as does the view further down the canyon.
Upper Falls
View down canyon
As mentioned earlier, the Falls Trail used to continue down the canyon all of the way to the Rio Grande River, but a sign indicates that the lower part of the trail is now closed, and a wooden barricade bars your way.  Thus, after viewing Upper Falls you must turn around and retrace your steps 1.5 miles to the Visitor Center to complete the hike.

Wednesday, July 23, 2014

Pecos National Historical Park: Ruins Trail (Blog Hike #476)

Trail: Ruins Trail
Hike Location: Pecos National Historical Park
Geographic Location: south of Pecos, NM (35.55047, -105.68627)
Length: 1.2 miles
Difficulty: 1/10 (Easy)
Date Hiked: July 2014
Overview: A mostly paved loop through ancient Pueblo ruins.
Hike Route Map: http://www.mappedometer.com/?maproute=320000
Photo Highlight:

Directions to the trailhead: “North” (in interstate geography) of Santa Fe, take I-25 to SR 63 (exit 307).  Exit and go north on SR 63.  Drive SR 63 4 miles to the signed Visitor Center access road on the left.  Turn left and park in the Visitor Center lot.  The trail starts behind the Visitor Center.

The hike: When you think of American Civil War battles, names such as Gettysburg, Manassas/Bull Run, and Antietam probably come to mind, but did you ever hear about the Civil War battle in New Mexico?  Though only a territory at the time, New Mexico was the home to two Union forts: Fort Craig located 100 miles south of Albuquerque and Fort Union located on the Santa Fe Trail northeast of Santa Fe.  In 1862, Confederate Brigadier General Henry Hopkins Sibley, nicknamed “Walking Whiskey Keg” for this enamor of hard liquor, led a group of 3000 Texans north from El Paso through the Rio Grande valley.  His objectives were to capture the Union forts, recruit new Confederate soldiers, secure the territory’s mineral wealth for the Confederates, and open a route to California ports for Confederate trade.
            On February 21, 1862, Sibley arrived at Fort Craig, where the two sides fought to a stalemate: Sibley did not have enough strength to capture the fort, but the Union did not have the forces to pursue Sibley.  Undeterred, Sibley continued up the Rio Grande valley, capturing an undefended Santa Fe on March 13.  By late March, Union forces commanded by Colonial John P. Slough decided to make a stand at Glorieta Pass, a narrow stretch of canyon used by the Santa Fe Trail as it heads “north” out of Santa Fe.  As a side note, we still use the Santa Fe Trail today, but we call this part of it I-25.
            On March 28, the Confederate and Union forces engaged in battle.  Although the Confederates pushed the main Union lines back, a small band of Union soldiers outflanked the Confederates and destroyed all of their supply wagons.  With no supplies, Sibley was forced to retreat first to Santa Fe and then ultimately to El Paso.  By July 1862, the Confederates had left New Mexico for good.
            Interestingly, the Union and Confederate armies were not the first to recognize the strategic importance of Glorieta Pass.  Some 400 years earlier, over 2000 Pueblo and Apache Indians lived here in a 4-story high pueblo made of stone and mud.  The American Indians were drawn here by the two reliable water sources nearby: Glorieta Creek to the west and the Pecos River to the east.  In the late 1500’s, the civilization was conquered by the Spanish conquistadors, who introduced Christianity and left the original pueblo in ruins.
Established in 1965, 6671 acre Pecos National Historical Park preserves the Civil War battlefield, the pueblo ruins, and the ruins of the Spanish mission.  While the best way to see the battlefield is by the park’s van tour, the ruins are best explored by hiking the 1.2 mile Ruins Trail described here.  The entire trail is very exposed to the sun, so be sure to wear a hat and sunscreen if you are hiking during the summer months.
Trailhead: Ruins Trail
            After passing through the Visitor Center, perhaps viewing the movie or exhibits along the way, step out the back door to begin the trail.  Immediately the sweet pinyon pine scent greeted me.  The rock-lined paved trail climbs slightly through the scant forest of pinyon, juniper, and ponderosa pines.  Interpretive signs tell you that the Pecos Pueblo was a center for trading activity.  American Indians from as far away as the Great Lakes and the Pacific Ocean came here to trade goods.
Prickly pear cactus in bloom
            At 0.2 miles, you pass the stone walls that defined the outer boundary of the pueblo.  A prickly pear cactus was blooming just outside the walls on my visit.  Just inside the walls sits the stone ruins of the south pueblo, a separate structure from the main pueblo.  Because this pueblo lies between the main one and the Spanish mission, some archeologists think this pueblo was built by American Indians who were allied with the Spanish after their arrival in 1540.           
Entrance to kiva
            Just past the south pueblo lies a kiva, an underground chamber used by the Pueblo Indians for ceremonial purposes.  You can climb down a ladder to get a closer look at the chamber if you wish.  Next on your tour is the trash mound, where the pueblo inhabitants buried their trash.  Much of what we know about this people comes from this mound’s excavation, which was performed by Alfred Kidder in the 1920’s.  Kidder is credited with developing techniques for unearthing and analyzing ceramics.  His techniques remain in use today.
            After passing a trail shelter that overlooks the Pecos River valley, the trail enters the ruins of the main pueblo.  As you walk along the trail, you are walking through the plaza area that sat in the middle of the pueblo.  In its heyday, the four-story-high structure would have completely surrounded this plaza with people living in small rooms on all stories.  The dirt and stone ruins beside the trail today are about half that height.
Walking through the plaza
            At 0.7 miles, you reach the ruins of the Spanish mission.  When I visited Pecos, scaffolding surrounded part of the structure as park officials were engaging in a preservation effort.  The mission ruins are the tallest ruins on this site, and the trail curves through some of the side rooms that served the main chamber.
Spanish mission ruins
            Past the mission, the trail reaches a secondary parking lot beside the maintenance area, where it turns sharply left.  The trail turns to gravel for the final leg of its journey back to the Visitor Center.  An interpretive sign points out wagon ruts from the old Santa Fe Trail just before you come out at the front of the Visitor Center, thus closing the loop and completing the hike.

Saturday, July 5, 2014

New River Gorge National Park and Preserve: Burnwood Trail (Blog Hike #475)

Trail: Burnwood Trail
Hike Location: New River Gorge National Park and Preserve, Burnwood Day Use Area
Geographic Location: north of Fayetteville, WV (38.07416, -81.07749)
Length: 1.2 miles
Difficulty: 2/10 (Easy)
Date Hiked: June 2014
Overview: A short lollipop loop with nice beech and hemlock trees.
Hike Route Map: https://www.mappedometer.com/?maproute=941194
Photo Highlight:

Directions to the trailhead: From Fayetteville, take US 19 north.  Immediately after crossing the New River Gorge Bridge, where the entrance to the Canyon Rim Visitor Center goes right, turn left to enter the Burnwood Day Use Area.  Park in the large gravel parking area; the trail starts behind the restroom building.

The hike: Most of the millions of people who come to New River Gorge each year cross over US 19’s famous New River Gorge Bridge.  Completed in 1977, the bridge is the longest steel span in the western hemisphere.  The rusty color of the supporting steel is exactly that: rust.  Coating the outside of the steel with rust protects the inside of the steel from the elements while eliminating the need to paint the bridge.  Paint would perform the same task but at higher cost and risk to workers.
            The New River Gorge National River’s Canyon Rim Visitor Center on the north side of the bridge offers fantastic overlooks of both the bridge and the gorge.  The Visitor Center is also the northern terminus of Fayette Station Road, the old switchbacking road through the gorge that served as the main route until 1977.  Some videos and exhibits round out the Visitor Center’s offerings.
Across US 19 from the Visitor Center lies a lesser used facility, the Burnwood Day Use Area.  The reason this area gets so little use becomes apparent when you drive into the trailhead.  The area contains only a large gravel parking lot, a restroom building, a picnic shelter, and the short Burnwood Trail described here.  This trail, formerly known as the Laing Loop Trail, does not lead to any gorge overlooks.  The trail’s main attractions are some nice beech and hemlock trees and a nature study area for kids.
Trailhead: Burnwood Trail
Start at the signed trailhead behind the restroom building.  The trail immediately enters the woods and descends gradually to head around a shallow ravine.  At 0.2 miles, the trail curves right and climbs slightly.  An old rusty metal fence marks a property boundary from the land’s pre-park days.
Old rusty metal fence
The trail assumes a grassy track up the left side of an old field.  Trees are just starting to infiltrate the field area, so the natural process of forest succession has just begun.  That process will continue for many more years until the field is completely reforested.
At 0.3 miles, you reach a trail intersection with a sunny grassy trail going right and a shady forest trail going left.  Though no markings indicate such, you need to turn left here to stay on the Burnwood Trail.  If you turn right like I did the first time, you will hike 0.2 miles through the old field to reach a small cemetery near US 19.
Hiking along the reverting field
100 feet into the woods, the trail forks to form its 0.6 mile loop.  For no particular reason, I chose to turn right and hike the loop counterclockwise.  The trail descends slightly into a shallow ravine to reach a children’s nature study area.  Unfortunately, nobody was staffing this area on my visit.
Hiking through the forest
The trail next climbs slightly to reach some of the nicest forest on this hike.  The sizes of the largest hemlock and beech trees that live here indicate that this land has not been logged for some time.  At 0.7 miles, the trail comes within sight of the gorge through the trees on the right.  This would be a nice place to build an overlook, but one of reasons this trail stays away from the rim is so that kids can hike here with no risk of falling into the gorge.  Thus, you will need to get your gorge views at the Visitor Center across the road.  At 0.9 miles, you close the loop, and 0.3 miles of retracing your steps remain to return to the parking area and complete the hike.

Friday, July 4, 2014

Pipestem Resort State Park: River/County Line/Lake Shore Loop (Blog Hike #474)

Trails: River, Canyon View, County Line, Lake View, Lake Shore, and Den Tree Trails
Hike Location: Pipestem Resort State Park
Geographic Location: northeast of Princeton, WV (37.54051, -80.98327)
Length: 7.2 miles
Difficulty: 8/10 (Moderate/Difficult)
Date Hiked: June 2014
Overview: A grand tour of Pipestem Resort State Park featuring Heritage Point and Indian Branch Falls.
Hike Route Map: https://www.mappedometer.com/?maproute=941195
Photo Highlight:

Directions to the trailhead: From I-77, take exit 14 and follow signs to SR 20.  Turn left on SR 20 and drive 9.3 miles north on SR 20 to the park entrance.  Turn left to enter the park.  Drive the main park road 3.2 miles to the gravel parking area for the Arboretum on the right.  Park here.  If you reach the T-intersection for the lodge and the golf course, you have driven 0.2 miles too far.

The hike: For my general comments on Pipestem Resort State Park, see the previous hike.  This somewhat long dayhike tours most of the park’s points of interest except the river; a 1.25 mile one-way detour would even let you take in the river.  While no parts of this hike are exceptionally difficult, the last part of the County Line Trail is fairly steep.  Also, there are no easy ways to shortcut this hike: walking back along the park road actually makes the hike longer.  Make sure you pack plenty of water and know what you are getting into before you start out.
River Trail trailhead
            Your journey begins on the River Trail, which departs from a signed trailhead across the main park road from the arboretum.  Walk around a brown vehicle gate and begin a moderate descent on a wide two-track dirt trail.  The trail loses over 200 feet of elevation in the first 0.3 miles as you descend to reach a wide shelf in the Bluestone River gorge.  This shelf, which almost makes the Bluestone River gorge a gorge within a gorge, will contain the trail for the next few miles.
            Where the two-track switches back to the right at the bottom of the hill, continue straight to stay on the orange-blazed River Trail.  For the next mile the trail undulates slightly as it heads southwest with the outer gorge wall nearby on your left.  The park’s second-growth broadleaf forest consists mostly of oak, maple, and tulip poplar trees.  At 1.3 miles, you reach a junction with the Canyon Rim Trail.  We will continue straight on the River Trail later, but to get a view of the inner gorge, turn right here for a 0.3 mile side trip to Heritage Point.
Junction with Canyon Rim Trail
            The Canyon Rim Trail descends moderately through woods and grassy areas as it passes back and forth across a power line clearing.  The sections through the grassy areas are rather narrow.  To make matters worse, some outdated signs point the wrong way.  The final descent to Heritage Point is rather steep, and the small clifftop viewing area has no railings to prevent you from falling into the gorge.  Honestly, there are better gorge views elsewhere in the park, but this view has the distinction of being the only gorge viewpoint located under the rim.  Some rocks make for nice places to rest and enjoy the view.
View from Heritage Point
            Retrace your steps back uphill to the River Trail and turn right to continue your southward journey.  2.1 miles into the hike, you pass under the famous aerial tramway.  Few people ever see the tram from this angle, another distinctive feature of this hike.
Looking up at the tramway
            The trail treads around a couple of shallow ravines, after which the gorge shelf on which you are traveling widens.  At 2.7 miles, you reach the junction with the County Line Trail.  Turn left to begin your journey out of the gorge on the County Line Trail.  This trail gets its name from the fact that it crosses into adjacent Mercer County from Summers County, which contains the majority of the park.
            The next 0.9 miles are an easy cruise on what appears to be an old roadbed.  The trail follows the contour of the land as it heads into the broad and deep ravine of Indian Branch, which falls away to your right.  At 3.6 miles, you reach the short spur trail to Indian Branch Falls.  A small overlook area gives the top/side view of this ledge-type low-water-volume waterfall.  The view is somewhat encumbered by shrubs in the warm months, but the waterfall still makes a nice diversion.
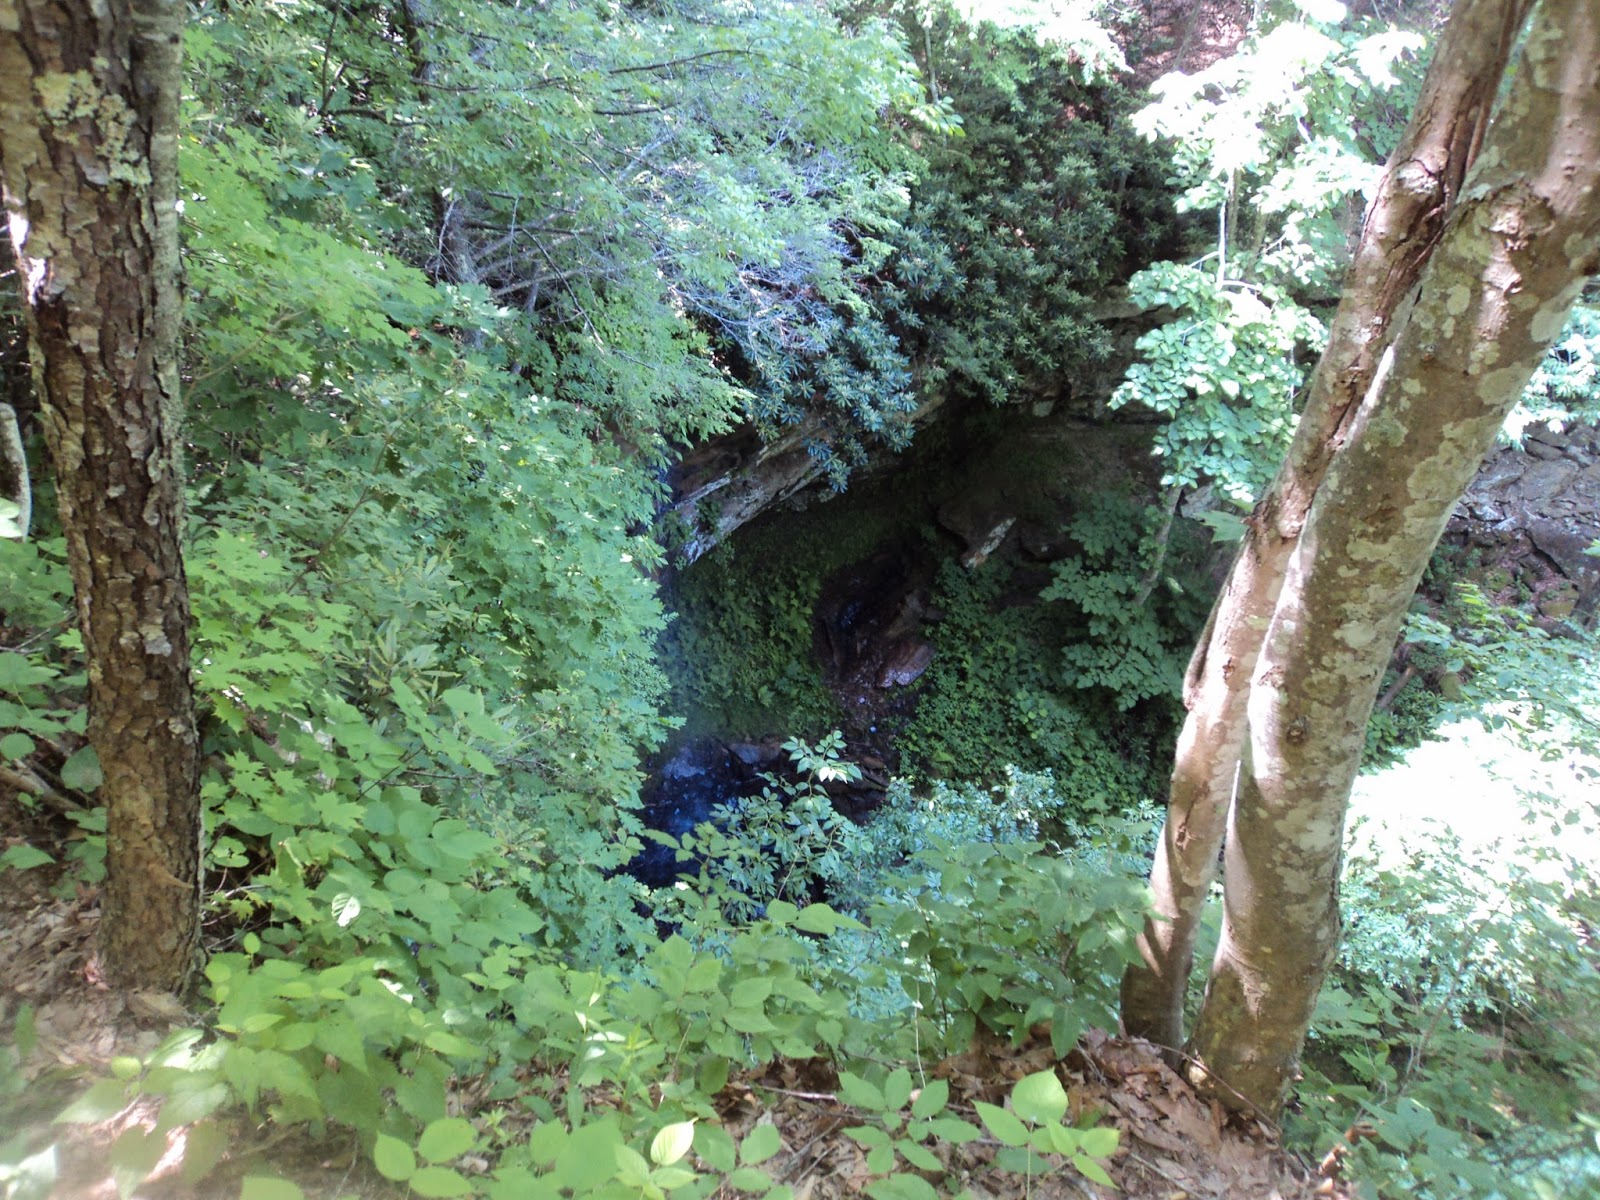
Indian Branch Falls
            Just past the waterfall, the County Line Trail turns left to leave the old road just before you reach a metal vehicle gate.  You may hear vehicles on the gravel road beyond this gate.  The next mile is the most difficult part of the hike, so now is the time to get your mojo on.  The trail climbs and descends a couple of low, steep arms that jut out from the main ridge, which rises to the left.  The ravine gets shallower as you continue along the left (south) side of the ravine.
Climbing on the County Line Trail
            At 4.4 miles, you start the steepest part of the climb.  The creek that has been hiding in the ravine to the right now merges with the trail, forming a deep rut down the middle of the trail.  After a pair of switchbacks, you reach the rim of the ravine and a junction with one of the park’s horse trails.  Turn left to reach an intersection with the Dogwood Trail (described elsewhere in this blog), then turn right to reach the Nature Center.  The Nature Center has some interesting exhibits and a nice bird watching window, but it is only open from 12:30 to 4:30.  I got lucky and arrived here just as the center opened.  Also, the drinking fountain in the Nature Center is the only potable water source on this hike.
            The next leg of this hike is the Lake View Trail.  To get there, walk out the Nature Center access road to the main park road, turn left, and pass a drive-up east-facing overlook.  The signed Lake View Trail trailhead sits on the right side of the road just past the overlook.  The park map shows a trail that goes directly from the Nature Center to this trailhead, thus avoiding the road walk, but this trail had become overgrown and unfindable on my visit.
East-facing park road overlook
Lake View Trail trailhead
            The Lake View Trail descends on another old road with a grassy area visible through the trees to your right.  Unlike some of the park’s other trails, this trail shows signs of heavy horse use.  5.3 miles into the hike, the Lake View Trail turns left to leave the old road.  There is a sign at this turn, but it is not in an obvious place.  I made the mistake of staying on the old road, which I followed for another 0.5 miles downhill to a vehicle gate at the park boundary.  I then paid for my mistake by retracing my steps 0.5 miles back uphill to this intersection.
            About 600 feet later, the trail forks with the signed horse trail taking the higher line to the left and the signed hiking/skiing trail taking the lower line to the right.  Of course, you should choose the option going right.  Although the park has designated this trail as hiker-only, I could tell that a large number of horses still find their way onto this trail.
Intersection with Lake Shore Trail
            At 5.7 miles, the Lake View Trail ends at an intersection with the Lake Shore Trail, which goes right and straight.  Because the Lake Shore Trail circumnavigates Long Branch Lake, you could go either way here.  For the shortest, least developed, and most scenic option, I chose to turn right and hike up the east side of the lake.
Hiking the Lake Shore Trail
The wide blue-blazed dirt trail undulates gently as it dips in and out of ravines.  Ironically given its name, the Lake Shore Trail on this side of the lake always stays at least 30 feet above lake level.  The lake can be seen only through the trees during the leafy months.
            6.3 miles into the hike, the trail curves right and climbs moderately but only for a short distance to tread around a particularly large ravine.  The trail maintains this higher elevation as the concrete dam that forms Long Branch Lake comes into view through the trees to the left.  A single switchback brings the trail down to dam-level and a signed intersection with the Den Tree Trail, which is located in a grassy clearing.  Turn right to begin the Den Tree Trail, the final leg of this hike.
Intersecting the Den Tree Trail
            After wading through some tall grass, you enter the forest and cross Long Branch Creek on a small wooden footbridge.  As hard as it may be to believe, this small stream is indeed the outflow of Long Branch Lake.  The Den Tree Trail is harder to see on the ground than most of this park’s trails, but copious red paint blazes will keep you on course.
Crossing the Law Hollow Trail
             6.9 miles into the hike, you cross the much wider Law Hollow Trail.  Continue straight on the Den Tree Trail.  The trail first tackles the hillside directly then angles up the hill more gently as the park’s cabins come into view on the hilltop above you to the right and the boat rental area comes into view at the lake beneath you to the left.  Some young pine trees grow near a power line clearing.
After passing under the power line, the trail seems to end as the blacktop trail to the boat rental area comes into view on the left.  Make your way down to the paved trail using whatever route seems most feasible, then continue climbing gradually on the paved trail.  Where the paved trail curves right, turn right on a grassy trail to climb a little more, soon reaching the arboretum.  A left turn and short walk across the mown-grass of the arboretum will return you to the arboretum parking lot and complete the hike.