Monday, July 25, 2016

Grindstone Nature Area: Grindstone Nature Trail (Blog Hike #597)

Trail: Grindstone Nature Trail
Hike Location: Grindstone Nature Area
Geographic Location: south side of Columbia, MO (38.92584, -92.31166)
Length: 1.7 miles
Difficulty: 3/10 (Easy/Moderate)
Date Hiked: June 2016
Overview: A lollipop loop through an old agricultural area and atop limestone cliffs.
Hike Route Map: http://www.mappedometer.com/?maproute=537614
Photo Highlight:

Directions to the trailhead: Near Columbia, take I-70 to US 63 (exit 128A).  Exit and go south on US 63.  Drive US 63 south 1.9 miles to SR 740.  Exit and turn right on SR 740.  Drive SR 740 west 0.9 miles to Old US 63 and turn left on Old US 63.  Drive Old US 63 south 0.4 miles to the park entrance on the right.  Turn right to enter the park, and park in the only parking lot.

The hike: Located just off campus from the University of Missouri, Grindstone Nature Area protects 199 acres along Grindstone and Hinkson Creeks.  The historic Boone’s Lick Trail, a major route across Missouri used by early settlers, passed through this area in the early 1800’s.  Corn and other crops were grown on this land for many years, and some evidence of this land’s agricultural past will be seen on this hike.  The City of Columbia purchased the land in 1975 as part of a greenbelt plan, thus forming the park.
            True to its name, Grindstone Nature Area has only a parking lot, a restroom building, a picnic shelter, and an off-leash dog area for amenities, so nature is allowed to take center stage.  Two concrete bike paths have trailheads here, and several miles of natural surface trails pass through the Nature Area.  Grindstone Nature Area also features two creeks that, like many of central Missouri’s waterways, are lined with tall limestone cliffs.  While several routes are possible, the route suggested here takes you past some of this land’s agricultural remnants and atop the limestone cliffs.
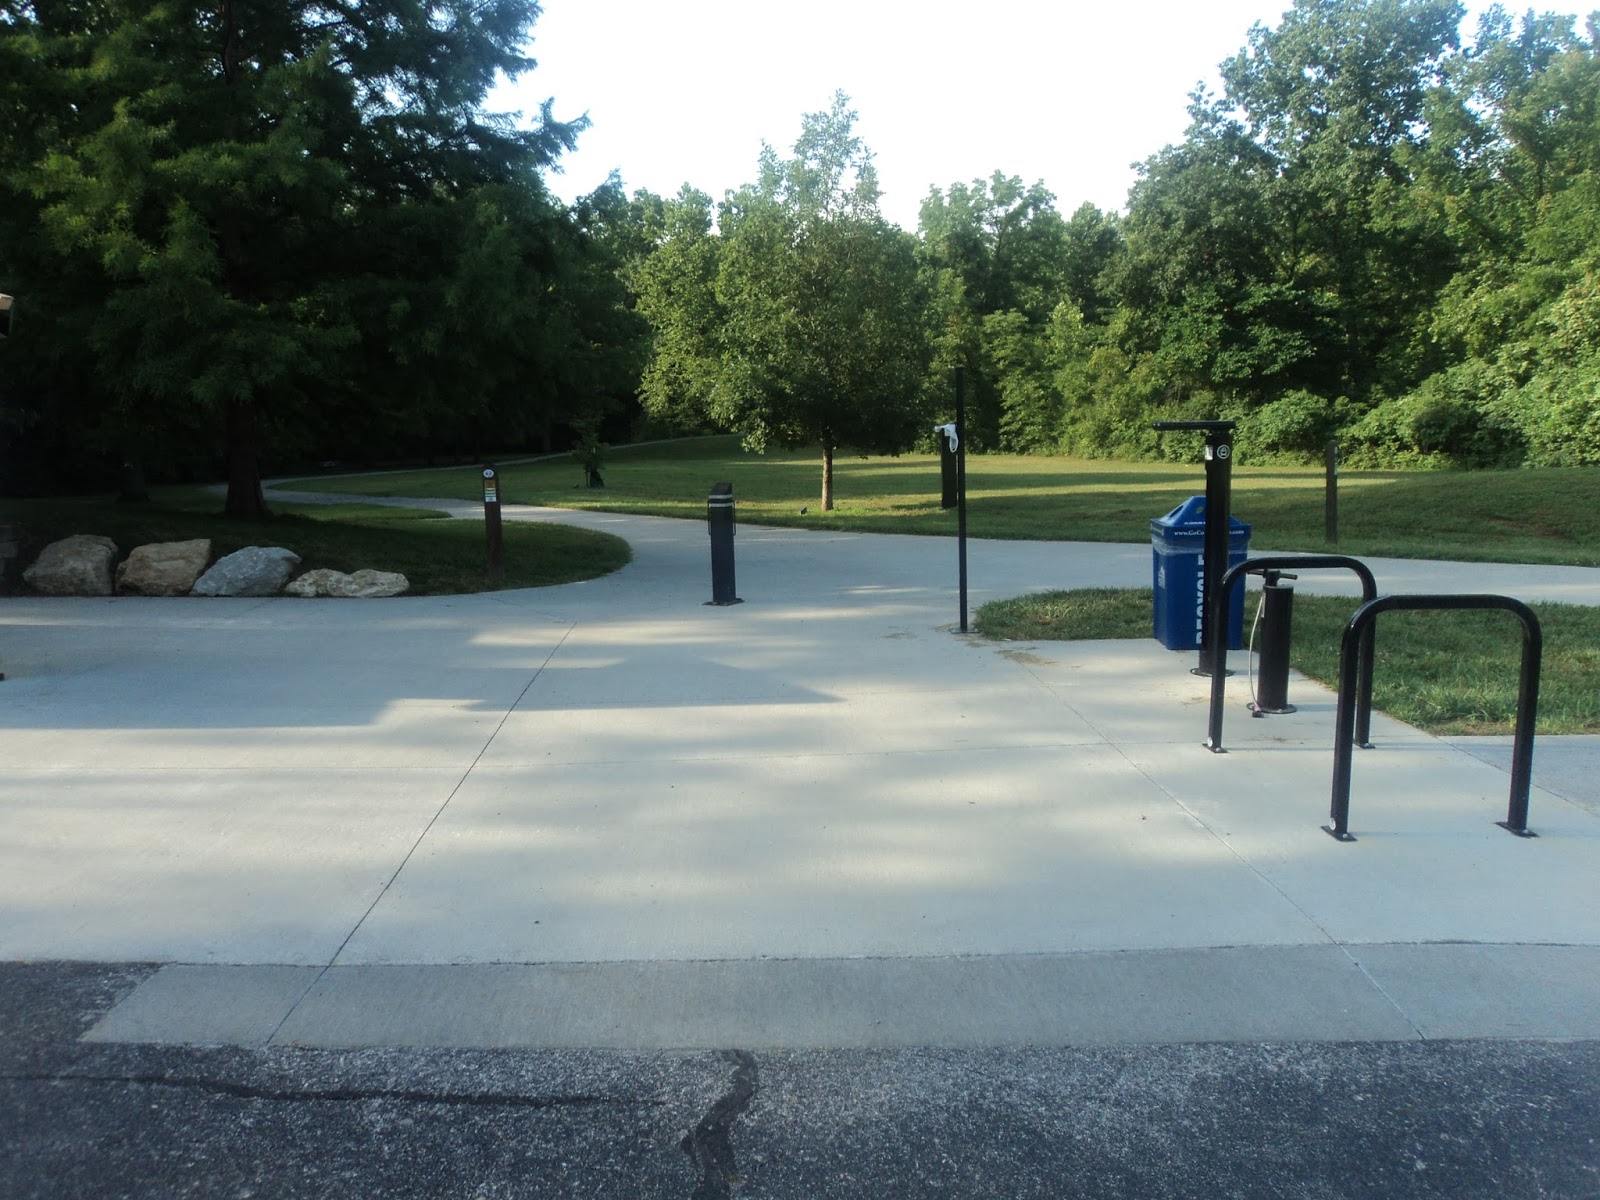
Trailhead area: Hinkson Creek Trail
            This hike starts at the rear of the parking lot on the crushed gravel Hinkson Creek Trail, which is also open to mountain bikes.  The Hinkson Creek Trail links the nature area to the University of Missouri campus.  The trail curves right to cross Grindstone Creek on an iron bridge with wooden deck.  The Ridgeline Trail exits left in this area, but it was very overgrown on my visit.
            After crossing Grindstone Creek, look for the mulch trail that exits the bike path on the right.  This mulch path is the start of the hiker-only Grindstone Nature Trail, so angle right to begin the Nature Trail.  Less than 200 feet later, you pass a tall concrete silo on the right, one of the reminders of this area’s agricultural history.
Concrete silo
            Just past the silo, the trail splits to form its loop.  This hike will continue straight on a path that heads up the right side of a prairie planting and use the narrow path exiting right into the woods as its return route.  None of the trails at Grindstone Nature Area are marked or signed.  With the many narrow and winding trails that exist here, this trail system could really benefit from some better trail markings to make trails and trail intersections easier to identify.
            The grass-dirt trail heads northwest in almost a straight line with the prairie planting on your left and the woods on your right.  Continue straight wherever side trails exit left or right.  At one point the trail seems to head into the woods on a mulch path, but it quickly comes back out into the prairie.
Hiking through the prairie
            Just shy of 0.7 miles, you reach a T-intersection at the northwest edge of the prairie with options going left and right.  The trail going left quickly leads back to the gravel Hinkson Creek Trail, and it could be used if you wanted a hike entirely in the prairie.  To also see the limestone cliffs for which this part of Missouri is famous, turn right to begin following a sewer line, a reminder of this hike’s suburban setting.
            Upon reaching the edge of the prairie, turn left to head into the woods, which features a large number of cottonwood trees.  The trail surface turns to packed dirt as it curves right to begin paralleling Hinkson Creek.  Some narrow trails exit left and right, but the main trail assumes a southeasterly course with the creek several feet to your left.  As I mentioned above, some trail markings would really help here.  Also, the packed dirt soil can become quite slippery when wet, so take your time and watch your step.
Climbing gradually
            Slowly but surely you gain elevation as you climb to the bluffs overlooking first Hinkson and then Grindstone Creeks.  There are no developed overlooks, but some spur trails take you to the edge of the cliff, which stands some 70 feet above the creek level.  At first trees block any views, but finally at 1.2 miles a clear view over an apartment complex to the east emerges.  No railings guard the edge of the cliff, so mind your position relative to the drop-off.
View from cliff top

Looking down from the cliffs at Grindstone Creek
            The trail becomes a bit rockier and narrower as you continue southeast.  A brief descent precedes a brief ascent to the bluffs overlooking Grindstone Creek.  The creek waters are visible below, but trees block any expansive views.  A final descent brings you to the mulch trail beside the old concrete silo to close the loop.  A left turn returns you to the packed gravel Hinkson Creek Trail, where another left turn returns you to the parking lot to complete the hike.

Sunday, July 24, 2016

Pioneers Park Nature Center in Lincoln, NE (Blog Hike #596)

Trails: (unnamed)
Hike Location: Pioneers Park Nature Center
Geographic Location: west side of Lincoln, NE (40.77445, -96.77537)
Length: 1.9 miles
Difficulty: 2/10 (Easy)
Date Hiked: June 2016
Overview: A loop hike through various kinds of prairie wetlands.
Hike Route Map: http://www.mappedometer.com/?maproute=537609
Photo Highlight:

Directions to the trailhead: On the west side of Lincoln, take US 73 to Van Dorn Avenue.  Exit and go west on Van Dorn Ave.  Drive Van Dorn Ave. west 1.6 miles to the main entrance for Pioneers Park, which is on the left.  Turn left to enter the park, then take a series of rights to follow signs for the Nature Center.  Park in the Nature Center’s concrete lot on the right side of the road.

The hike: Established in 1963, 950 acre Pioneers Park is the crown jewel of the City of Lincoln Parks and Recreation Department.  The original 500 acres were donated to the city in 1930 by John F. Harris as a Christmas gift.  The park’s many amenities include a golf course, an amphitheater that hosts an annual summer concert series, numerous ball fields, a bison pasture, and several miles of paved bike paths.  The developed areas of the park are popular for gatherings and festivals, including two that I drove past on my way to the trailhead.  The drive to the trailhead also passes some interesting statues, some of which date to the early 1900’s.
            Fortunately for hikers, Pioneers Park’s western 668 acres have been preserved in their natural state as Pioneers Park Nature Center.  The natural area straddles Haines Branch Creek, but the trails south of the creek were closed due to construction on my visit.  Thus, the hike described here visits all of the park’s major points of interest north of Haines Branch Creek.
Trail entrance gate
            From the parking area, cross the entrance road and enter the Nature Center through a gate in a chain link fence.  Note the time when this gate is scheduled to close (5pm on my visit) and make sure you plan to be out well before then.  Our tour through the trail system turns left on the mulch trail reached immediately after walking through the gate.  You may want to check out the exhibits and pick up a trail map in the Chet Ager Building directly ahead before you start your tour of the natural area, but the exhibit building was also closed due to construction on my visit.
            The mulch trail heads east before making a sweeping 180-degree right turn around a demonstration beehive.  Soon the first of many seasonal wetlands appears on the left.  The trail map calls this area the Wood Duck Wetlands, but the frogs greatly outnumbered the ducks on the hot early afternoon of my visit.  All of the ponds at Pioneers Park were dug in the 1930’s in an attempt to attract more water fowl, but the lack of springs in this area means that they only have water when runoff is sufficient to fill them.  The ponds were nearly full on my late June hike, but they have been known to dry up completely during a drought.
Wood Duck Wetlands
            At 0.2 miles, you reach a trail intersection located directly in front of the Chet Ager Building.  To head deeper into the natural area, turn left to tread a narrow strip of land between the Wood Duck Wetlands on the left and the larger Heron Wetlands on the right.  When I walked by this side of the Heron Wetlands, a blue heron flew above the water right on cue.
            After crossing a wooden footbridge over a small channel that connects the two wetlands, you reach another trail intersection.  Angle left here to begin walking an old road and head for Fleming Woods, this hike’s next destination.  The trail soon jogs right to leave the old road and pass through another gate in another chain link fence.  This gate marks your entrance to Fleming Woods, and it too has a posted scheduled closing time.
Hiking through Fleming Woods
Fleming Woods is a fairly small grove dominated by oak trees, and a double loop takes you through the area.  This double loop used to be a triple loop, but part of the last loop got washed out by a Haines Branch Creek flood a few years ago.  Thus, if you accidentally start the third loop, which is easy to do because none of the trails are signed or marked, you will have to backtrack to continue the second loop.
            0.6 miles into the hike, a short narrow spur trail to Owl Point exits left.  Owl Point forms a wide 180-degree bend in Haines Branch Creek, and a staircase gives access to the stream.  Contrary to what you might expect this far from the sea, the water in Haines Branch Creek is slightly salty due to this area’s large salt deposits.  The steps to the creek were very overgrown with grass when I came here, and the overall level of maintenance throughout the trail system was adequate but less than ideal.
Haines Branch Creek
            After closing the Fleming Woods loop and walking back out the chain link fence gate, angle left at the next few trail intersections.  At 0.9 miles, you reach the north end of a suspension bridge over Haines Branch Creek.  Consisting of a wooden deck strung from steel cables, this suspension bridge is the park’s only route across the creek.  Over 3 miles of trails lie south of the creek, and you should feel free to cross the bridge and hike them if they are open on your visit, which they were not on mine.  Thus, I had to continue straight to stay on the north side of the creek.  The trail map calls this trail the Animal Trail though no signs on the ground indicate such.
            At 1.05 miles, you enter the sunny prairie just before reaching a signed trail intersection.  The trail going straight provides the shortest route back to the parking area, but I suggest turning left to hike a loop through the lowland prairie.  The wide dirt/grass trail heads west with the Muskrat Wetland, which is constantly visible on the right.  I saw more birds and another heron in this seasonal wetland.
Muskrat Wetland
            As you approach the park’s western boundary, the trail curves right to cross a pair of boardwalks over wet areas.  The park’s bison pasture appears over a fence to the left, but I saw no bison on my hike.  After tracing along the north side of the Muskrat Wetland, you reach the end of the lowland prairie loop, where a left turn is required to continue this hike.
            The trail joins an old gravel road as it passes a small aviary on the right.  The aviary features hawks, owls, eagles, and turkeys, and the birds in these cages are here because they have sustained injury and could not survive in the wild.  Just before reaching the park road, the trail curves right to head through a narrow strip of woods with the paved road on the left and the Heron Wetlands on the right.  Heading east parallel to the park road, you pass some flower beds to reach the main trail entrance gate, where a left turn exits the natural area and returns you to the parking lot.

Saturday, July 23, 2016

Medicine Bow National Forest: Turtle Rock Trail (Blog Hike #595)

Trail: Turtle Rock Trail
Hike Location: Medicine Bow National Forest, Vedauwoo Picnic Site
Geographic Location: southeast of Laramie, WY (41.16082, -105.37588)
Length: 2.8 miles
Difficulty: 4/10 (Easy/Moderate)
Date Hiked: June 2016
Overview: A loose circumnavigation of Turtle Rock.
Hike Route Map: https://www.mappedometer.com/?maproute=731007
Photo Highlight:

Directions to the trailhead: In southeastern Wyoming, take I-80 to the Vedauwoo exit (exit 329).  Exit and go north/east on Vedauwoo Road.  Drive Vedauwoo Rd. 1.2 miles to the entrance to the Vedauwoo Campground and Picnic Site on the left.  Turn left to enter the site, and pay the small entrance fee.  Follow signs for the Turtle Rock west trailhead, and park in the small blacktop lot at the trailhead.

The hike: Although the rocky ridge between Laramie and Cheyenne stands more than 100 miles east of the continental divide, it contains the highest elevation on Interstate 80’s 2903 mile cross-country journey.  The Union Pacific Railroad used the present-day I-80 corridor across this ridge as a route for the first transcontinental railroad in the late 1860’s, and the historic Lincoln Highway also passed through here.  In fact, a monument to the Lincoln Highway sits in the median of I-80 just east of exit 329.
            The unusual-shaped rocks of the Vedauwoo formation also sit atop this ridge, and Vedauwoo is protected as part of Wyoming’s vast Medicine Bow National Forest.  The national forest is named for Medicine Bow Peak, a scenic 12,000-foot mountain located west of Laramie.  The name Vedauwoo comes from a corruption of an Arapaho word that means “earth-born.”
            The national forest’s Vedauwoo Campground offers 28 campsites, and the adjacent Vedauwoo Picnic Site contains numerous picnic areas.  Vedauwoo is also a trailhead for a system of national forest trails that head north into the heart of the rock formations.  The largest rock formation at Vedauwoo is known as Turtle Rock, and many experts view the circumnavigation of Turtle Rock described here to be southeastern Wyoming’s best short hike.  If possible, you may want to plan a weekday visit to Vedauwoo: the area’s unusual rock formations and location just off of I-80 make it a popular destination. 
Turtle Rock west trailhead
              Your trip around Turtle Rock starts at the rear of the west trailhead parking area.  The dirt Turtle Rock Trail heads west into the aspen forest, which seems unusually lush and green compared to surrounding areas.  Large numbers of thorny pink wild rose bushes were in full bloom beside this part of the trail on my late June visit.
Wild roses
            The trail descends slightly as the pink/orange hues of Turtle Rock begin to appear above you to the right.  The entire Vedauwoo formation is made of Sherman granite, which geologists believe to be some of the oldest rock in Wyoming.  Wind and water sculpted the odd-shaped hoodoos that make this area so scenic.
Turtle Rock's hoodoos
            Between 0.3 and 0.4 miles some of Turtle Rock’s most scenic formations appear above you ahead and to your right.  In addition to being a nice hiking destination, Turtle Rock is also a top-tier rock climbing destination, and I saw several climbing groups working their way up the hoodoos on my late afternoon hike.  As you head further around the rock, some small ponds appear to the left.  Beavers have built several lodges in these ponds, and the ponds’ water attracts many kinds of wildlife, thus making for good wildlife viewing on this hike.
Pond at base of Turtle Rock
            Just shy of 1 mile and at the lowest elevation of the hike, an unmarked trail exits left to head deeper into the national forest’s trail system.  Though the Turtle Rock Trail is unblazed and rarely signed, it is pretty easy to follow: at every trail intersection choose the option that stays closest to Turtle Rock.  The trail now begins a gradual to moderate climb, and it will gain 150 feet of elevation over the next 0.5 miles.  While the total elevation gain on this trail is less than 300 feet, the hike stays above 8000 feet in elevation for its entire length, so the altitude will cause you to get winded faster than usual if you live at lower elevations like I do.
Turtle Rock in the distance
            Now heading east on the north side of Turtle Rock, the trail alternates between sunny, slightly rocky desert-like terrain and shady conifers.  Turtle Rock’s hoodoos now stand several hundred feet to the right.  Parts of the trail pass over bare granite, but for the most part the going is fairly easy.  As you gain elevation, some partially obstructed views of the surrounding Wyoming countryside emerge.
Trio of boulders
            At 1.9 miles, you pass an unusual trio of boulders that sit alone on bare granite.  Next, a sign directs you to angle left just before another trail from deeper in the trail system enters from the left.  The trail now descends slightly to reach another lush wet area.  This area features a small creek with a small waterfall.
Small waterfall
            After passing through a gate that marks your re-entrance into the developed picnic area, you need to stay left where a spur trail exits right to prematurely enter the Vedauwoo Picnic Site.  The final segment of trail passes beside another small pond before emerging at a trailhead parking area with vault toilets.  Unfortunately, this parking area is the Turtle Rock east trailhead parking lot, not the Turtle Rock west trailhead parking lot where your car resides.  Thus, this hike ends with a paved road walk through the Vedauwoo Picnic Site. 
Heading due west takes you first uphill and then downhill to the correct parking area to complete the hike.  While you are here, you may also want to check out the short 0.5 mile asphalt trail that explores Turtle Rock’s box canyon, a narrow rocky ravine through the middle of the rock formation.  The trailhead for the asphalt trail lies to the right along the final road walk through the picnic site.

Friday, July 22, 2016

Bear River State Park: Nature Trail (Blog Hike #594)

Trail: Nature Trail
Hike Location: Bear River State Park
Geographic Location: south side of Evanston, WY (41.26111, -110.93455)
Length: 3.1 miles
Difficulty: 2/10 (Easy)
Dates Hiked: July 2011, June 2016
Overview: A series of short, flat loops along the Bear River.
Hike Route Map: http://www.mappedometer.com/?maproute=537597
Photo Highlight:

Directions to the trailhead: In southwestern Wyoming, take I-80 to Bear River Drive (exit 6).  Exit and go south on Bear River Dr.  Take Bear River Dr. less than 0.1 miles to the park entrance on the right.  Turn right to enter the park, then drive the main park road 0.5 miles to a small parking area on the right opposite the bison/elk pen.  Only a brown nature trail sign marks this parking lot.  Park here.

The hike: Although the Bear River starts and ends in Utah, its unusual 350 mile horseshoe-shaped course carries its agriculturally valuable water through three different western states.  The river’s source lies in the high Uintas Mountains of northeastern Utah, so snowmelt is a major contributor to the river’s water.  In fact, when I first came to Bear River State Park in July 2011, extremely rapid snowmelt had caused the river to flood, and I was unable to hike any of the park’s trails because they were all underwater.  After leaving Utah, the Bear River flows north through extreme western Wyoming before curving west into Idaho and finally curving south to empty into Utah’s Great Salt Lake.
Conveniently located just off of I-80, Wyoming’s Bear River State Park protects 280 acres along its namesake river.  Bear trappers named this river in the early 1800’s due to the large number of bear that lived here.  The park opened only in 1991, and a concrete bike path connects the park to the nearby town of Evanston.
            The park today is most famous for its elk and bison pastures, though I saw no elk or bison on my visit.  The park’s only amenities are a few picnic shelters and trails, so in some sense Bear River State Park feels more like a city park than a state park.  The park’s developed area lies on the east side of the river, so this hike explores the multiple loops of the Nature Trail on the west side of the river.
Beginning of Nature Trail
            Two footbridges cross the Bear River within the park’s boundaries, a northern downstream bridge and a southern upstream bridge.  This hike starts by crossing the downstream bridge, which is a fairly new iron/wood structure that departs the rear of the Nature Trail parking area.  At the west side of the bridge, you reach a T-intersection with options going left and right.  Nature Trail loops lie in either direction, so you could go either way here.  I chose to turn right and hike the two downstream loops first.
            At 0.2 miles, the gravel trail splits to form the first loop.  The trails at Bear River are unmarked, so I suggest turning right at every intersection to avoid hiking in circles.  Such a choice will hike all of the loops counterclockwise.  Choosing the trail going right here will keep you close to the river bank on your right as you continue a northward course.
Seasonal wetland
            Where the trails come back together at the northern end of the first loop, continue straight to begin the second loop, the northern-most loop.  Some seasonal ponds appear to the left of the trail, and the abundance of water here compared to the surrounding semi-arid region makes this park an above average destination for birding and wildlife viewing.  On my visit, I saw numerous red-winged blackbirds among other common mountain birds, some rabbits, and some deer.
A rabbit in the grass
            As you curve left to round the northernmost loop, first I-80 and then an active railroad track come within earshot on the right.  After closing the northernmost loop, make two right turns to hike the western arm of the next loop.  This area features more grassy/shrubby terrain interlaced by seasonal wet areas.
            1 mile into the hike, you close another loop, where another right turn brings you back to the western end of the footbridge on which this hike started.  Continue straight to head for the southern upstream Nature Trail loops.  The wide gravel trail winds its way south with the river on the left, sometimes close and sometimes several yards away.  Large rocks have been placed in some areas to stabilize the river bank.
Hiking along the Bear River
            After briefly joining a two-track gravel road under a power line, the trail splits to form the southern loop.  Keeping with the right-turn oriented route identified above, angle right to hike the loop counterclockwise, and then stay right at the next two trail intersections.  At 1.7 miles, you reach yet another trail intersection.  Continue straight to hike a short 0.15 mile side loop through an area that features some odd piles of logs, possibly piled-up debris from river flooding.  Upon closing the short loop, turn right at this same intersection again to continue the main loop.  This section of trail also features some nice new wooden footbridges.
Pile of flood debris
            2 miles into the hike, you approach the park’s southern boundary, which is marked by a wire fence.  The trail now curves left as the west bank of the Bear River comes into view.  At 2.25 miles, you intersect an old gravel road.  Turn right on the old road to quickly reach an old steel and wood road bridge that now serves as the park’s southern upstream footbridge over Bear River.  Turn left at this bridge to keep heading downstream along the west bank of the river.
Old road bridge over Bear River
            The final 0.8 miles parallel the Bear River, sometimes close and sometimes at a distance.  Wherever other trails exit left, choose the trail closest to the river.  Just shy of 3 miles, you reach the west end of the northern downstream footbridge for a third and final time.  A right turn and short walk over the bridge returns you to the trailhead parking area to complete the hike.

Yosemite National Park: Tuolumne Grove (Blog Hike #593)

Trail: Tuolumne Grove Trail
Hike Location: Yosemite National Park
Geographic Location: Crane Flat, CA (37.75785, -119.80524)
Length: 2.9 miles
Difficulty: 4/10 (Moderate)
Date Hiked: June 2016
Overview: An out-and-back with short loop on an old road to a grove of giant sequoia trees.
Hike Route Map: https://www.mappedometer.com/?maproute=731006
Photo Highlight:

Directions to the trailhead: The signed trailhead for Tuolumne Grove is located on SR 120 (Tioga Road) 0.5 miles east of Crane Flat.  To get there from Yosemite Valley, drive Big Oak Flat Road 10 miles north out of the valley to its intersection with SR 120 in Crane Flat.  Turn right on SR 120 and drive 0.5 miles to the trailhead parking area on the left.  There is a large parking lot at the trailhead, but it can fill during the warm months.

The hike: For my general comments on Yosemite National Park, see my first hike in Yosemite Valley.  To greatly oversimplify, Yosemite has three main attractions: big waterfalls, big views, and big trees.  Some of the big waterfalls were featured on my hike up the Mist Trail, while the previous two hikes to Sentinel Dome and Glacier Point give a sample of the big views.
            Yosemite’s most famous example of big trees is the Mariposa Grove located near Wawona in the park’s southern section.  Indeed, the Mariposa Grove and Yosemite Valley were the two areas protected by the Yosemite Grant of 1864, a precursor to the park’s founding as described in my first hike in Yosemite Valley.  Unfortunately, on my visit in 2016 the Mariposa Grove was closed to visitors due to a restoration project.  Not wanting to miss out on the big trees entirely, I chose to hike to the Tuolumne Grove on my way out of the park.  While there are not as many giant sequoias here as there are in the Mariposa Grove, the big trees that do live here are quite impressive, and I enjoyed my visit to Tuolumne Grove.
Tuolumne Grove trailhead
            The hike starts at an information board at the northwest corner of the parking area.  The Tuolumne Grove Trail’s wide asphalt treadway may look more like a road than a trail, and there is a good reason why: this route is the old Big Oak Flats Road that was used until modern SR 120 was built.  Some interpretive signs and some old road signs confirm this observation.
            The trail descends on a gradual to moderate grade at first heading due north but later via a pair of broad switchbacks.  The majority of the trail features nice high-elevation conifer forest, but the old paved road actually makes for rather uninspiring hiking despite this trail’s excellent destination.  Also, a large number of Yosemite’s pines have recently died as a result of the years-long drought that has plagued California, so brown tree carcasses lined parts of this trail on my visit.
Entering Tuolumne Grove
            At the bottom of the second broad switchback, you reach an area with some benches where a sign announces your arrival at the Tuolumne Grove of Giant Sequoias.  Just past this sign, you reach the grove’s first truly giant tree.  You will have no problem picking out the sequoias from the rest of the forest: they tower more than 200 feet high and have trunks that are more than 6 feet thick.  Many people stop to admire this tree, but several more of its relatives lie ahead.
Giant sequoia tree
Another giant sequoia tree
            The first giant sequoia stands near the top of a short double loop trail that goes through the Tuolumne Grove.  Signs identify the trail through the grove as the Grove Loop.  To make the climb back up a little easier, I suggest staying with the asphalt trail until reaching the bottom of the double loop and then hiking the unpaved section back up, thus hiking the double loop clockwise.  In another 0.2 miles you reach a small set of picnic tables and the bottom of the Grove Loop.  As directed by a sign that says “Grove Loop Begin,” turn right to leave the asphalt and begin the dirt Grove Loop.
A fallen giant sequoia
            The trail crosses a small stream on a wooden footbridge before climbing briefly to reach a fallen giant sequoia.  The huge log that now sits beside the trail is probably thicker than you are tall, and a “normal-sized” tree on which the giant fell gives proper visual perspective.  More climbing takes you past a sequence of interpretive signs that tell you more about the giant sequoias.  Seemingly all aspects of the sequoias from their cones to their roots to their rings are explored by these signs.
The tunnel tree
            Just past 1.5 miles, you close the first of the two loops by arriving back at the picnic tables only to turn left and immediately begin the second one.  Another brief steep climb brings you to the Tunnel Tree, the stump of a fallen giant sequoia through which a person-sized tunnel has been drilled.  Walking through a wooden tunnel gives you an odd feeling, but it also reinforces the size of these trees.  A brief descent brings you back to the main asphalt trail and closes the double loop.  Angle left and walk back uphill for another mile to return to the parking area and complete the hike.

Thursday, July 21, 2016

Yosemite National Park: Glacier Point (Blog Hike #592)

Trail: Glacier Point Trail
Hike Location: Yosemite National Park
Geographic Location: Glacier Point, CA (37.72760, -119.57442)
Length: 0.7 miles
Difficulty: 1/10 (Easy)
Date Hiked: June 2016
Overview: An asphalt lollipop loop to possibly the best view in California.
Hike Route Map: https://www.mappedometer.com/?maproute=943236
Photo Highlight:

Directions to the trailhead: To get to Glacier Point from Yosemite Valley, drive SR 41 south out of the valley.  Turn left on Glacier Point Road, and follow Glacier Point Rd. to its end.  The drive to Glacier Point takes just under an hour under normal conditions.  Glacier Point is a popular destination, but the parking lot is large and features fairly quick turnover among its vehicle occupants.

The hike: For my general comments on Yosemite National Park, see my first hike in Yosemite Valley.  This hike is a short trip around Glacier Point, which many people claim provides the best view in Yosemite and maybe all of California.  The first half of the loop is handicapped accessible, and the entire loop offers an easy enjoyable hike for most people.
Sign at Glacier Point Trailhead
            From the information board at the trailhead, ignore the Panorama Trail and the trail to the amphitheater on the right in favor of the asphalt trail that heads slightly downhill past the Glacier Point Snack Stand on the left.  (Aside: as goofy as it sounds, Glacier Point Snack Stand is in fact the park’s official name for this building, which contains a gift shop and a concession area with limited hot food offerings.)  The first viewpoint is located across the trail from the snack stand.  This vista faces east, causing Half Dome and Nevada Fall to take center stage with the Cathedral Range’s higher mountains in the background.  When I came here in late June, the highest peaks were still snow-capped although most points below 10,000 feet were snow free.
View across from snack stand
            Just past this first view, the trail splits to form its loop around Glacier Point.  This description turns left to hike out on the handicapped-accessible trail and hike back on the slightly steeper asphalt trail going right.  After descending some switchbacks that make this trail navigable in a wheelchair, the dirt Four Mile Trail exits the asphalt to the left at a signed intersection.  As its name suggests, the Four Mile Trail descends 4.6 rocky miles and 3200 vertical feet to Yosemite Valley.  Although this hike stays right to head for Glacier Point, an interesting journey could be formed by parking in Yosemite Valley, riding a bus to Glacier Point, and hiking back down on either the Four Mile Trail here or the longer and somewhat more gradual 8.5 mile Panorama Trail mentioned above.
            The trail climbs gradually using a couple of switchbacks to reach Glacier Point proper at 0.25 miles.  This viewpoint looks north and east directly across and into Yosemite ValleyYosemite Falls framed by taller mountains further away grabs your attention when you look north.  The view to the east features Half Dome, the Merced River gorge, which contains Nevada and Vernal Falls, and the Tenaya Creek gorge, which contains Mirror Lake.  This viewpoint is the one that makes Glacier Point famous, so take some time to enjoy the views.
Looking into Yosemite Valley

Yosemite Falls, as seen from Glacier Point

Half Dome and Nevada Fall
            To begin heading back to the parking lot, choose the non-handicapped accessible asphalt trail on the left.  The trail climbs slightly to reach a signed spur trail to the geology exhibit.  For a lesson on the formation of Yosemite Valley, turn left to climb some stone steps and reach a shelter that contains numerous interpretive signs.
Nevada and Vernal Falls
The geology exhibit talks about the glaciers that crept their way down the valley many millennia ago.  The glaciers’ ice ground the area’s weak rocks to powder, thus scouring the valley and leaving only the strong, towering, granite cliffs you see today.  In addition to the education, the area in front of the geology exhibit gives a nice view of Vernal and Nevada Falls far below.  A short downhill walk remains to return to the parking area and complete the hike.

Wednesday, July 20, 2016

Yosemite National Park: Sentinel Dome (Blog Hike #591)

Trail: Sentinel Dome Trail
Hike Location: Yosemite National Park
Geographic Location: west of Glacier Point, CA (37.71244, -119.58626)
Length: 2.2 miles
Difficulty: 7/10 (Moderate/Difficult)
Date Hiked: June 2016
Overview: An out-and-back to 360-degree views from Sentinel Dome.
Hike Route Map: http://www.mappedometer.com/?maproute=535250
Photo Highlight:

Directions to the trailhead: This hike starts at the signed Sentinel Dome trailhead, which is located on the north side of Glacier Point Road 2 miles west of (i.e. before you get to) Glacier Point.  The small trailhead parking lot fills up quickly, so plan an early morning hike to ensure you get a parking space.

The hike: For my general comments on Yosemite National Park, see my first hike in Yosemite Valley.  If 360-degree dome-top views of Yosemite sound appealing but the 14.2 miles and 4800 feet of elevation gain required to summit Half Dome seem beyond your ability, then perhaps a hike to Sentinel Dome is in order.  At 8122 feet in elevation, Sentinel Dome stands more than 900 feet higher than nearby more famous Glacier Point but only 700 feet lower than Half Dome.  Thus, Sentinel Dome’s view is almost as good as Half Dome’s but requires only a fraction of the effort to obtain.
Sentinel Dome Trailhead
            From the parking area, the entrance trail briefly heads downhill before splitting with options going left and right.  The trail going left leads to Taft Point, another interesting viewpoint that is worth exploring if you have the time and energy.  As directed by a wooden sign, turn right to head for Sentinel Dome.  The brown-gray bare rock dome that is your destination can be seen ahead and to your right over the trees.
Sentinel Dome in the distance
            After dipping to cross a small creek on a wooden footbridge, the trail climbs briefly over bare rock.  Parts of this trail are rather rocky, causing me to rate the difficulty 7/10, but overall this hike is fairly easy until you get to the final assault on Sentinel Dome.  Low evergreen bushes, tall Jeffrey pines, and fir trees make up the sparse vegetation.
            As you approach the base of Sentinel Dome, the trail joins a gravel service road that enters from the right.  This service road leaves Glacier Point Road 0.7 miles east of the Sentinel Dome trailhead, so you could use it to give an even shorter approach to the dome if you wanted to.  At 0.9 miles, the trail forks where the longer trail to Taft Point and Glacier Point exits right.  As indicated by a rust-covered metal sign, you need to turn left to keep heading up Sentinel Dome.
Rust-covered mileage sign
            Near this point of my hike I experienced one of the hazards of summer hiking in Yosemite: limb drop.  Limb drop is a phenomenon in which a large limb falls off of a healthy tree with no warning, thus potentially injuring any hikers under the tree.  Though limb drop sounds odd, it is sufficiently common that signs at park entrances warn of it.  On this occasion, the limb dropped several feet away from me and caused me no physical harm, but the sudden noise did cause me some fright.  The limb drop phenomenon is a danger to be aware of even though its rarity means you are unlikely to get hurt by it.
Final assault up Sentinel Dome
            The grade intensifies as you climb the dome’s northeast shoulder.  Most of the dome’s smooth granite sides are too steep for hikers, but the northeast face offers a steep but hikable (as opposed to only rock climbable) route.  Upon reaching the dome’s northeast shoulder, the trail curves sharply left to begin heading straight up the bare rock.  The trail on the rock is unmarked and hard to distinguish, so you have to pick your way up the dome using whatever route looks most feasible.  I found that a winding switchbacking route worked best.
            At 1.1 miles, you reach the flat area on the dome’s summit.  The 360-degree view from here is even better than the more famous one from Glacier Point, in my opinion.  Half Dome, Clouds Rest, and North Dome take center stage to the east.  Mount Starr King and the Clark Range appear to the south and southeast.  Yosemite Valley drops off to the north with El Capitan and the Cathedral Spires, two stark nearly vertical multi-thousand foot granite cliffs, guarding its entrance.  Nevada Fall and Yosemite Falls are also visible below.  A summit marker helps you identify some of the sites that can be seen from here.
Half Dome, Clouds Rest, and North Dome

Yosemite Falls

El Capitan

Cathedral Spires
The trail ends at this magnificent view, and the other sides of the dome are too steep to descend.  Thus, the shortest route back to the trailhead is to retrace your steps 1.1 miles.  Alternatively, a 4.9 mile loop can be formed by choosing the trail that connects Sentinel Dome and Taft Point and then hiking from Taft Point back to the trailhead.